 Who has an abundance of lemons this year? If you, like us, live near many citrus trees, you may wonder what to do with them all. Another thing we are blessed to have in abundance is berries. Strawberries, blackberries, mulberries, blueberries and raspberries with little fingers that love fruit! If you need ✨ FRESH ✨ideas to utilize these ingredients to make yummy treats, I have a new recipe for you to try! Today, I'm sharing a recipe for a delightful Blueberry Lemon Cake with Cream Cheese Frosting that is gluten and dairy free and oh so fluffy. It's also beautiful and great to serve at summer get togethers. INGREDIENTSFor the Cake:
For the Cream Cheese Frosting:
For Garnish:
INSTRUCTIONSPrepare the Cake:
Make the Cream Cheese Frosting:
Assemble the Cake:
Garnish:
Serve and Enjoy:
This cake is perfect for special occasions or any time you want to indulge in a delightful dessert. 🍋 🫐
0 Comments
If there was one recipe from my television show The Clean Plate with Mandi that was deemed the best, by viewers and crew alike, it was this one. Decadent, creamy and beautiful - it tastes dangerously close to the real thing. So much so, that you'll second guess that it's dairy and gluten allergen friendly. As mentioned in season one of our show, this dessert has a special place in my husband and I's hearts. It was the dessert we would seek out on date nights and indulge in on late movie nights before we were married. Now we can share it at home, anytime we like, and for the first time since the show premiered, so can you. 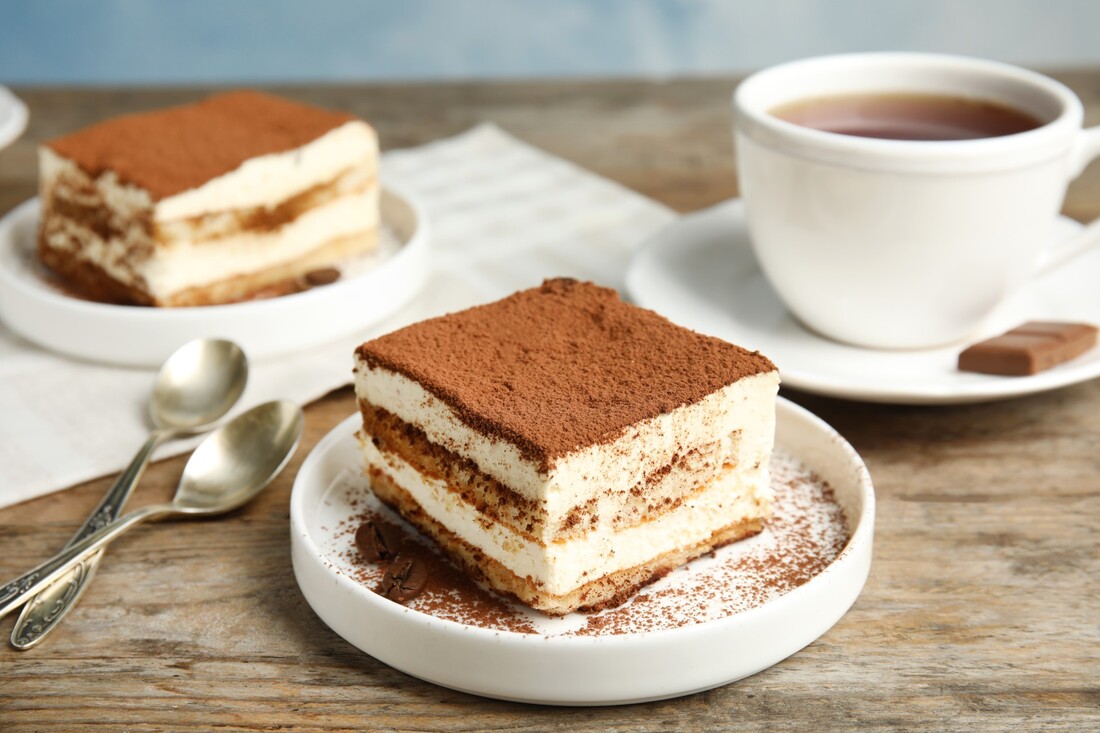 The Clean Plate with Mandi TiramisuIngredients
Directions
free of everything but bananas, haha Welp. It happened. We hit our first 100+ degree day here in Arizona and it's only May. It's fine. I'm fine. We're fine. Summer heat usually puts me in a big funk (bring on alllll things fall and winter and I'm a happy girl) but the last two years have left most of us in a big funk and I am determined to inject so much joy into this year I started with healthy ice cream. Or what is most commonly called "nice cream". 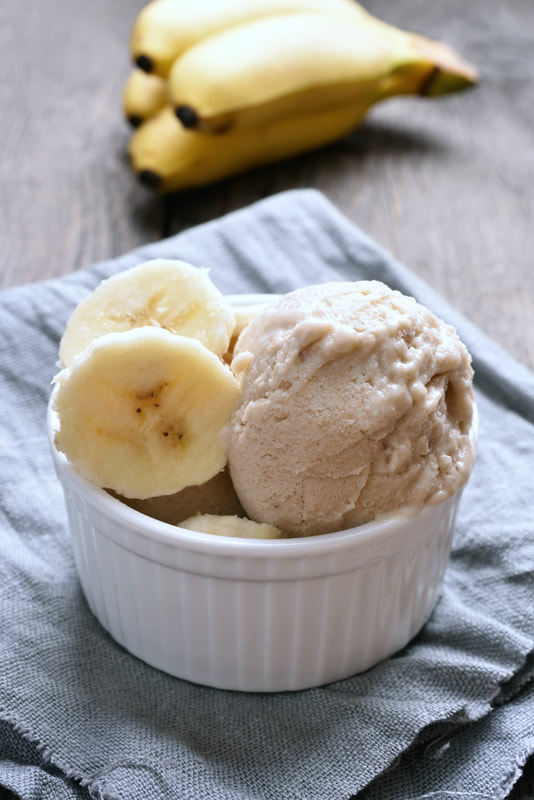 Made with three simple ingredients, this was a HUGE hit with the kids. They feel like they're getting an indulgent treat every day and we are finding a fun way to connect in the kitchen AND stay cool. Because the good Lord above knows we will need it for the next few months. 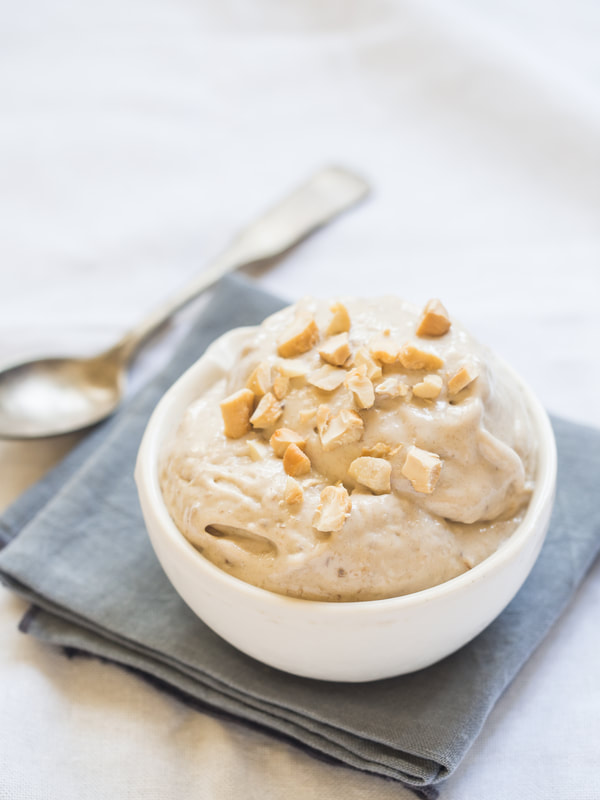 Banana Nice CreamWhat You'll Need
How To Make It
Do you have a favorite Nice Cream flavor? We also did a batch of Cinnamon Roll that I will add to the blog soon too!
We just got new popsicle molds and are on the hunt for a good ice cream maker and we have SO many ideas for this season! Share your favorites below! gluten free - dairy free - grain free - nut free - soy free It's officially winter here in southern Arizona - which means it's 70 in the day and our coats and fuzzy socks come out for the 50 degree mornings. A girl that's never spent more than a weekends vacation in the snow, this is winter to me and with that comes the want for cozy, warm, rich and comforting foods. And the occasional warm, fresh-from the oven, ooey-gooey treat. 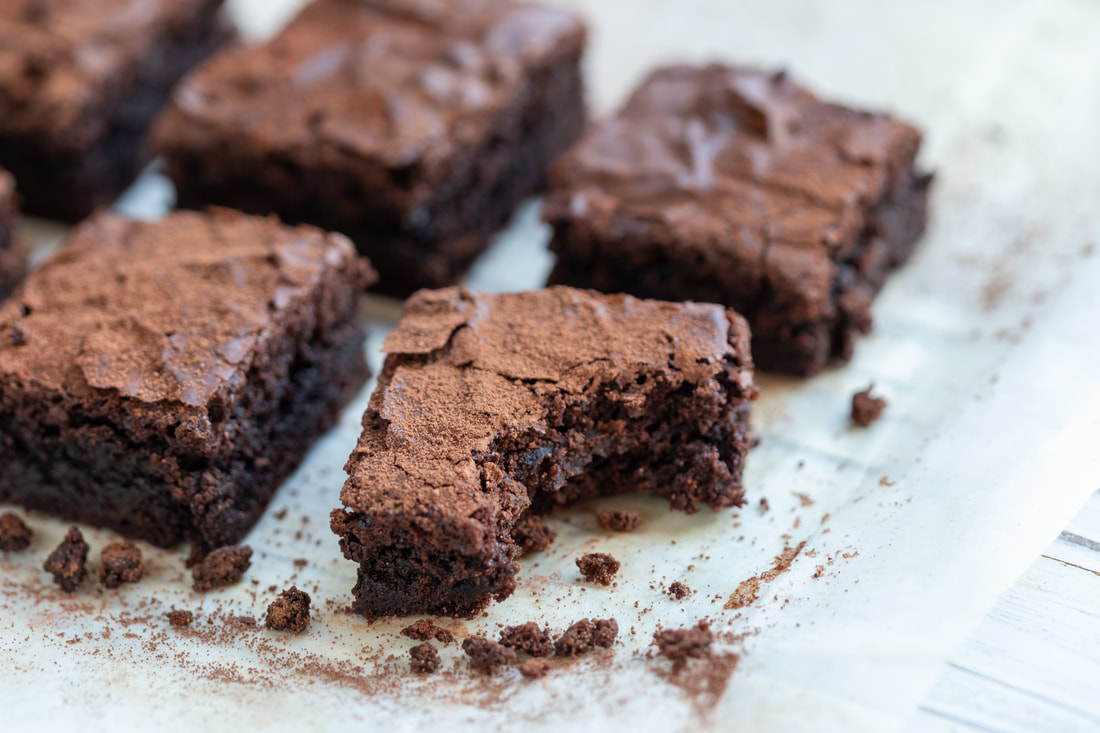 I was never a chocolate lover as a young kid or teen, and even my son is just starting to come around to the deep, rich flavors of a good cacao, so it wasn't until much later in life that I started to appreciate the brownie. As a matter of fact, making these this weekend was the first time my six year old son had ever tried one. What I love most about these? They are moist and fudgy and grain-free! Also gluten-free, nut-free, dairy-free and soy-free, they will fit nicely into most food allergy families. Just skip these ones if you can't bake with eggs. Quick to whip up, I suggest making a double or triple batch. Especially if you plan to share - because these go quick! 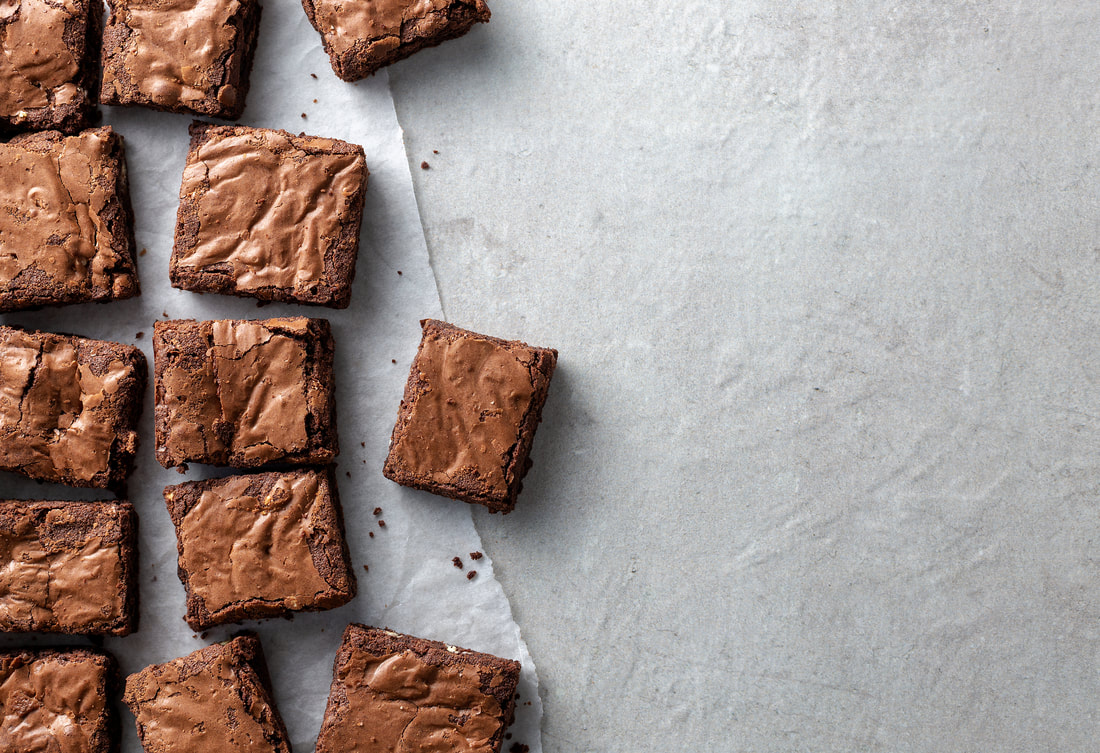 CASSAVA BROWNIESIngredients 2 eggs 1/2 C. avocado oil or vegan butter 1/3 C. cassava flour (I use Otto's, Anthony's or It's Just) 1 tsp. vanilla extract 1 C. coconut sugar 1 C. dark chocolate chips (we love the Enjoy Life morsels) 2 TSBP. cocoa powder pinch of sea salt (optional, but great for minerals and flavor!) Directions
Pin Me! vegan - gluten free - soy free - kid friendly - nut free THESE. ARE. SO. FLUFFY. SO fluffy and easy. A cutie little cookie that is so quick to whip up with my kindergartner while wearing my baby so we can have a little treat filling our cookie jar. They are vegan, gluten free and soy free and while not completely guilt-free (they do contain brown sugar), they are a tasty way to end a homeschool day and bond us in the kitchen. 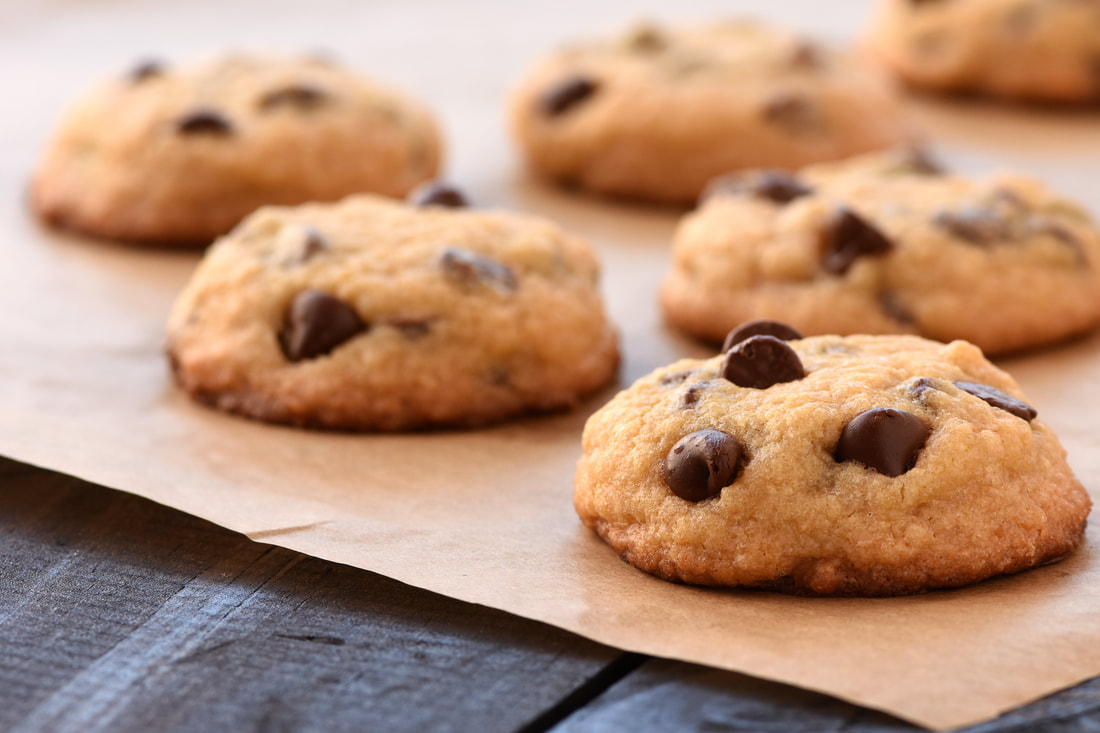 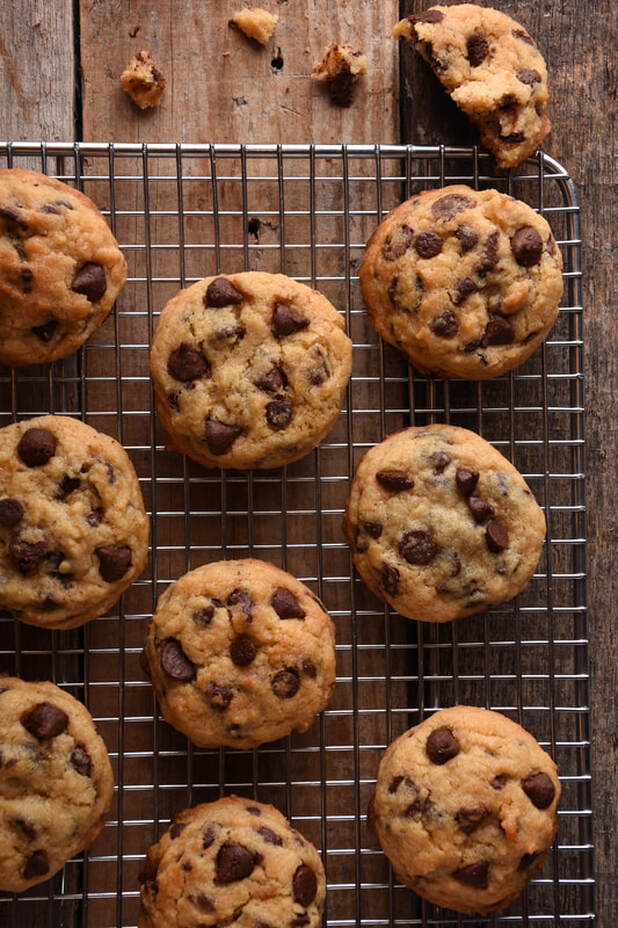 Vegan Banana Chocolate Chip CookiesIngredients
Instructions
gluten free - dairy free - soy free - nut free - kid friendly 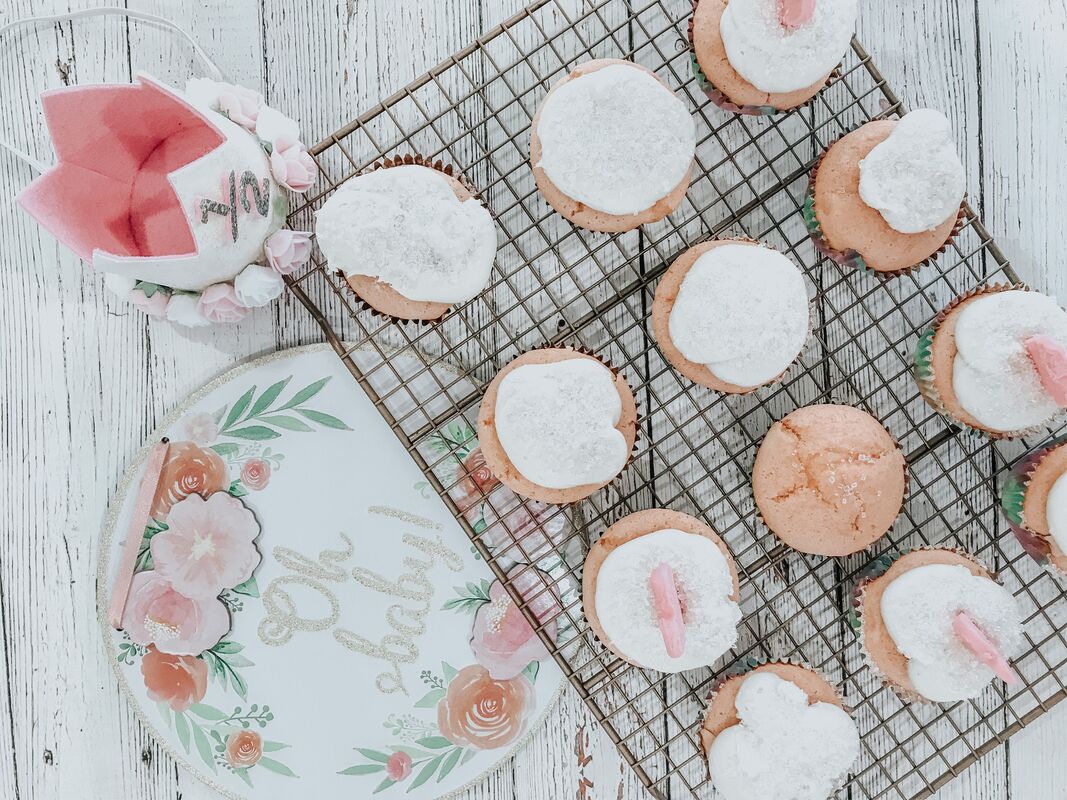 For Lexi's sweet little 1/2 birthday celebration we made pink champagne cupcakes with velvety vanilla buttercream frosting and pink molded chocolate hearts fit for a princess. Gluten, dairy and soy free, they are moist, delicious and perfect for any girly party. The recipe can be found below. Enjoy! 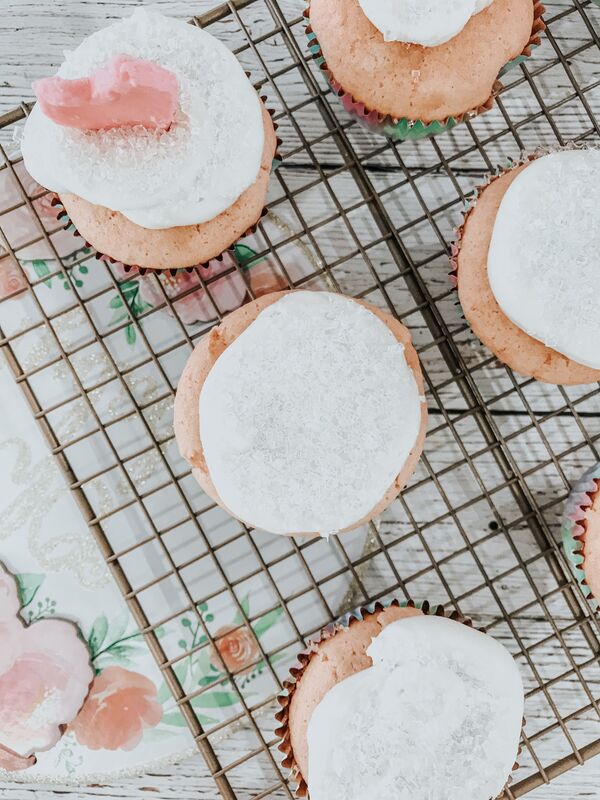 Pink Champagne Cupcakes & Velvety Vanilla Buttercream FrostingINGREDIENTS For the cake
For the frosting
DIRECTIONS Prepare the cupcakes
Prepare the frosting
Gluten Free - Dairy Free - Soy Free - Refined Sugar Free - Nut Free We are just ELEVEN days out from Christmas! ELEVEN PEOPLE! I haven't finished shopping (who I am kidding? I'm still in our newborn bubble with Miss Lexi, I barely just began shopping!) - we haven't planned our Christmas menu (the horror for a baker and chef!) and the house is mostly decorated. At least we will get to enjoy the festive decor throughout January when I probably would have it all finished by, haha. My husband still has to build our mantle (if you are new, we renovated a 1950's farmhouse late last year and we are doing project by project on a fun never-ending improvement spree on our sweet place.) I HAVE however been successful at delivering magic for our four year old. Christmas light drive-thrus and ALL the baking and he is a happy camper. So, I bring you our latest baking endeavor that's a hit here and sure to be a hit in your home as well. 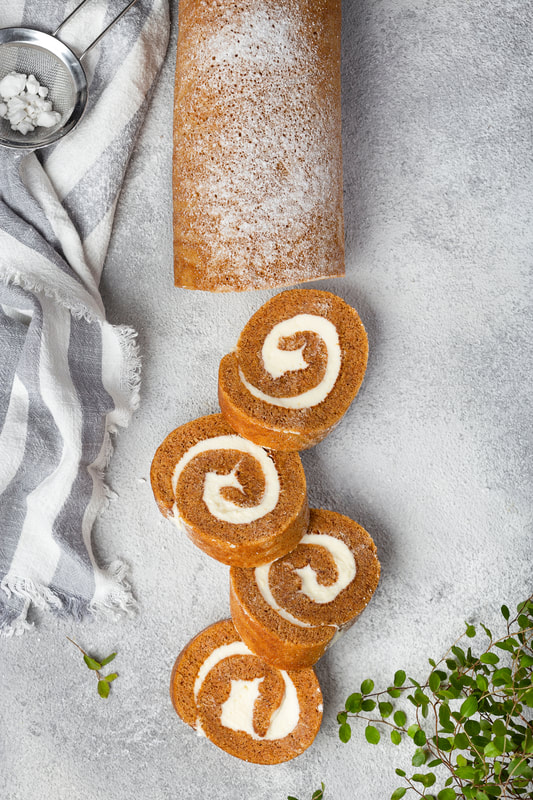 One of my FAVORITE holiday recipes is the classic Pumpkin Roll - but this spin makes it an Allergen Friendly Pumpkin Roll. It's one of the recipes my dad would make from scratch EVERY year for Thanksgiving or Christmas. (If you've watched my show, The Clean Plate with Mandi on Amazon Prime, you'll know I've spoke about how much my dad would cook and bake for us.) It's rich pumpkin flavor, moist cake and creamy center makes it a craveable treat year after year. And it presents beautifully, a must for when I'm choosing what to serve for family and friends. 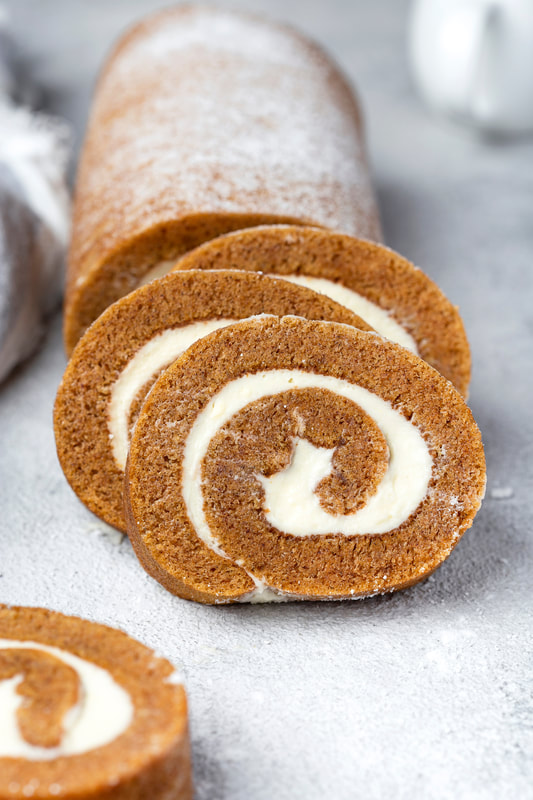
|
archives
July 2024
categories
All
|


 RSS Feed
contact
|
aboutNosh & Nurture was born of this journey I am on to better the health of myself, my family and those around me. What started as a simple compilation of recipes has grown to a all-around lifestyle journal with ways to incorporate organic products into your home, pantry and beauty cabinet. I also include stories on pregnancy, new motherhood, travel, Proverbs 31 marriage, and spiritual health, as I am a Christian who couldn't do any of this without my Lord & Savior Jesus Christ. For more of my story you can click here.
All recipes are gluten-free and dairy-free with a lot of soy-free, grain-free, sugar-free options. |
additional links
|

© 2012-2023 Nosh & Nurture. All Rights Reserved.
Website by Weebly. Photography, Graphics and Content by Mandi Pimental, unless otherwise credited.