nosh clean. nurture your soul.
  • HOME
  • NOSH
  • NURTURE
    • Homesteading
    • Homeschooling
  • TRAVEL
    • Get A Quote (Land Travel)
    • Get A Quote (Cruise)
    • Disney Vacations
    • Travel Blog >
      • Destinations
      • Eateries and Cafes
      • Travel Tips
  • The Clean Plate
  • ABOUT
  • CONTACT
  • Platinum Key

breakfast & brunch

Healthier Chocolate Puff Cereal

7/25/2023

0 Comments

 
Cereal can be such an easy quick food, it can also be a comforting food. Most cereals you find on the shelves today are loaded with food-dyes, pesticide sprayed grains and too much sugar. And while we prioritize protein at the start of our day sometimes moms just need a little snack that reminds us of our childhood. Or an easy breakfast for the kids.

Say it with me. We 👏🏼 don’t 👏🏼 have 👏🏼 to 👏🏼 be 👏🏼 perfect. Tried that. Didn’t work out for me. 

I put together an alternative for you, a healthier chocolate puff cereal, to try that’s both fun to make and not full of all the junk. As always it’s gluten and dairy free!
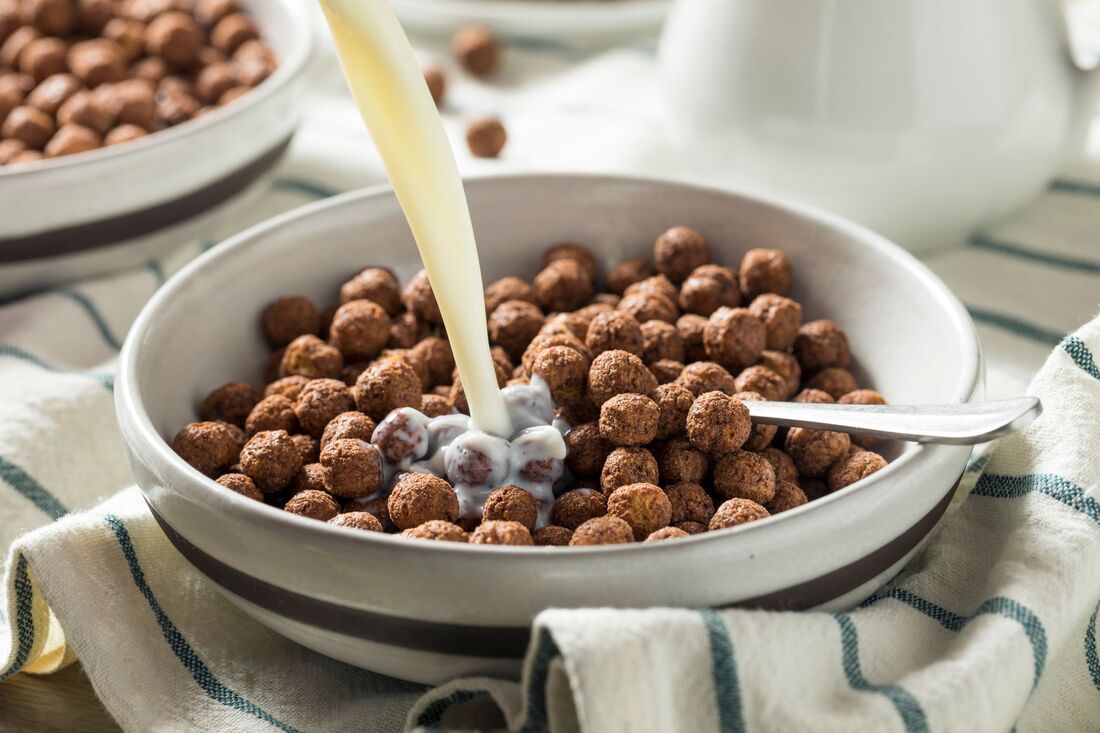
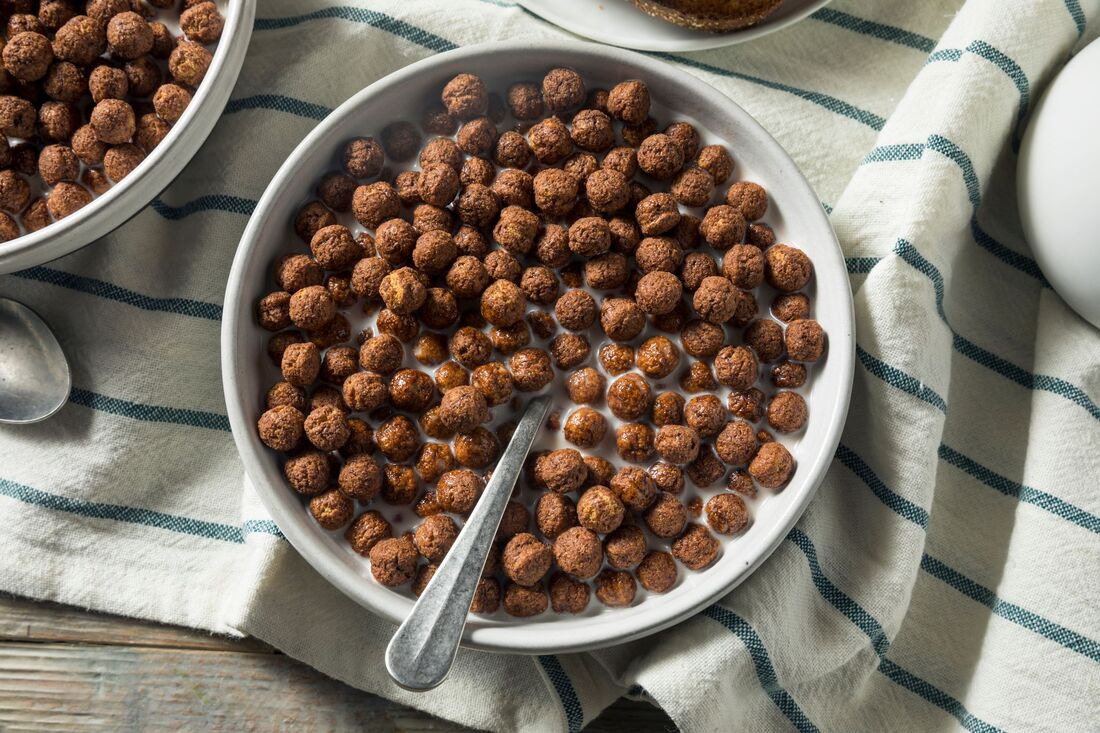

Picture
Picture

INGREDIENTS

  • 2/3 C gluten free oat flour
  • 3 TBSP maple syrup or agave
  • 3 1/2 TBSP seed or nut butter (we use natural sunbutter)
  • 2 1/2 TBSP cacao powder

DIRECTIONS

  • Preheat oven to 320 degrees. Line a baking sheet with parchment.
  • Combine seed or nut butter with sweetener in a bowl.
  • Add in your cacao and flour. Mix.
  • Shape with your hands into a dough. If you’re finding it dry, add more either nut/seed butter or syrup.
  • Divide dough into four sections and roll each section so it forms a long rope.
  • Using a knife, cut into small pieces and roll into the classic Cocoa Puff ball shape and size.
  • Transfer to baking sheet and bake for 10 minutes.
  • Cool completely (they will be soft until cooled) and store in an airtight container.

Do you have a favorite cereal from your childhood? This could be a fun recipe series!
0 Comments

5-Ingredient Sweet Potato Pancakes

4/28/2023

0 Comments

 
gluten free - dairy free - nut free option - kid friendly - soy free - paleo 

Picture
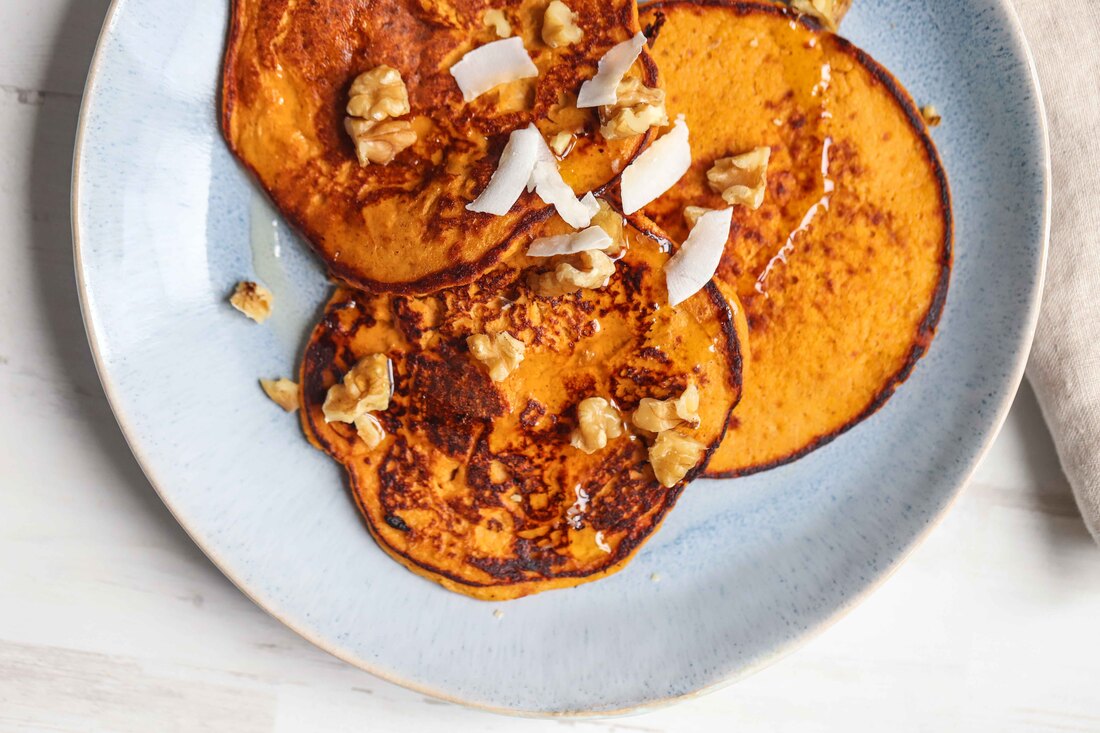
It's the weekend and you're wanting something that feels indulgent and sweet, but you also want it to be healthy.

These 5-Ingredient Sweet Potato pancakes are packed with protein and vitamins. The dash of cinnamon and drizzle of maple syrup satisfy the craving for something sweet and VOILA! the perfect weekend breakfast. 

The kids like these topped with berries over nuts, but I prefer the crunch! 
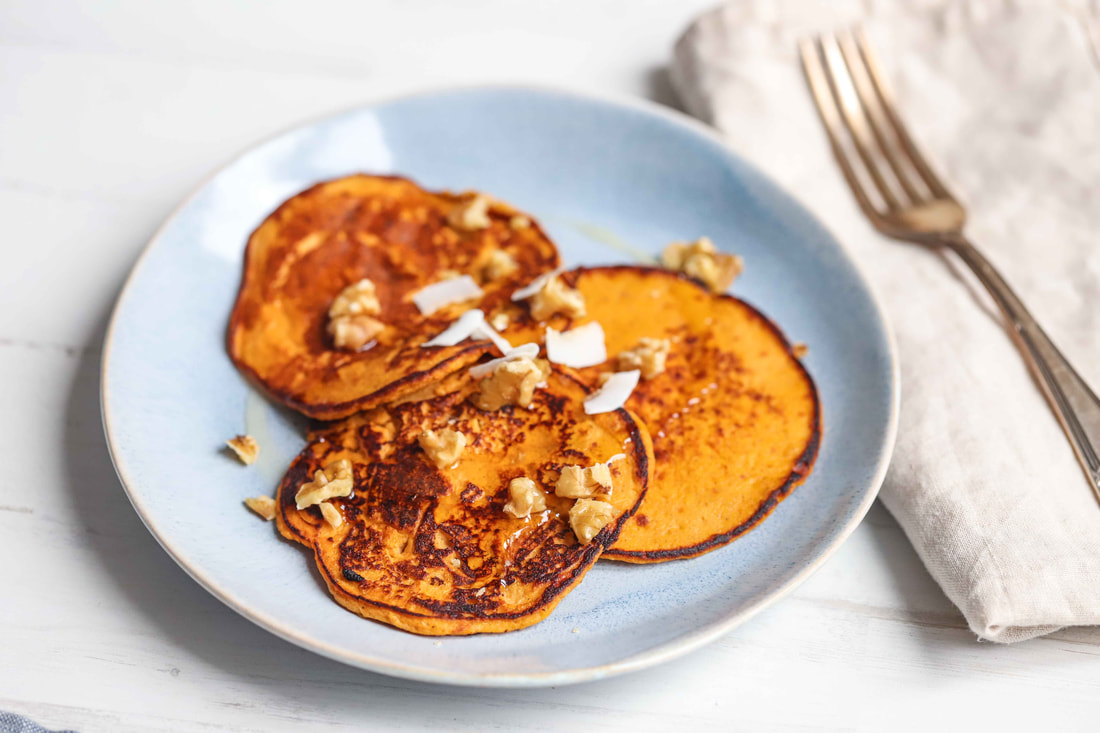
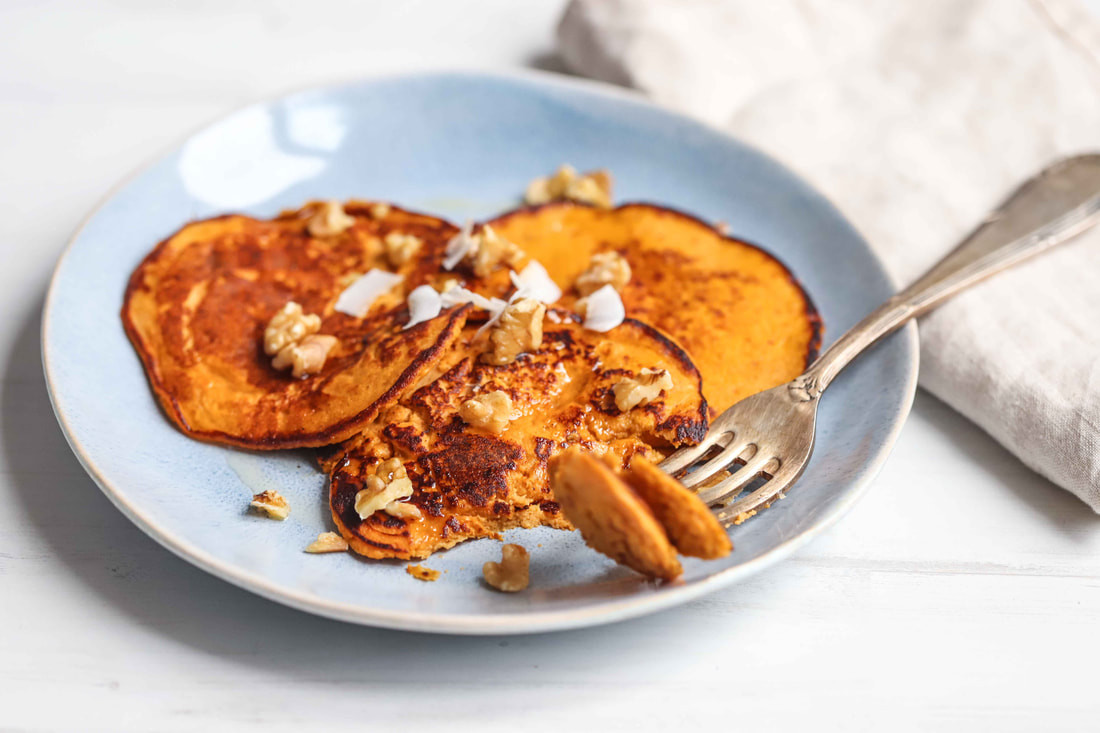
Picture
Picture
INGREDIENTS

  • 2 C. cubed and peeled sweet potatoes
  • 6 eggs
  • 1 tsp. cinnamon
  • 1 TBSP. coconut oil 
  • 2 TBSP. maple syrup
  • 1 C. chopped pecans and walnuts (optional)


DIRECTIONS

  • Boil the sweet potatoes in a pot of water for 15 minutes or until tender.
  • Drain potatoes and let cool
  • Place cooled potatoes in a large bowl. Add eggs and cinnamon and blend with a mixer. 
  • Heat 1/4 of coconut oil in a pan and add batter a few TBSP. at a time to form pancakes.
  • Fry the pancakes until bubbling. Flip to the other side and finish cooking until golden brown.
  • Top with maple syrup and nuts if desired. 


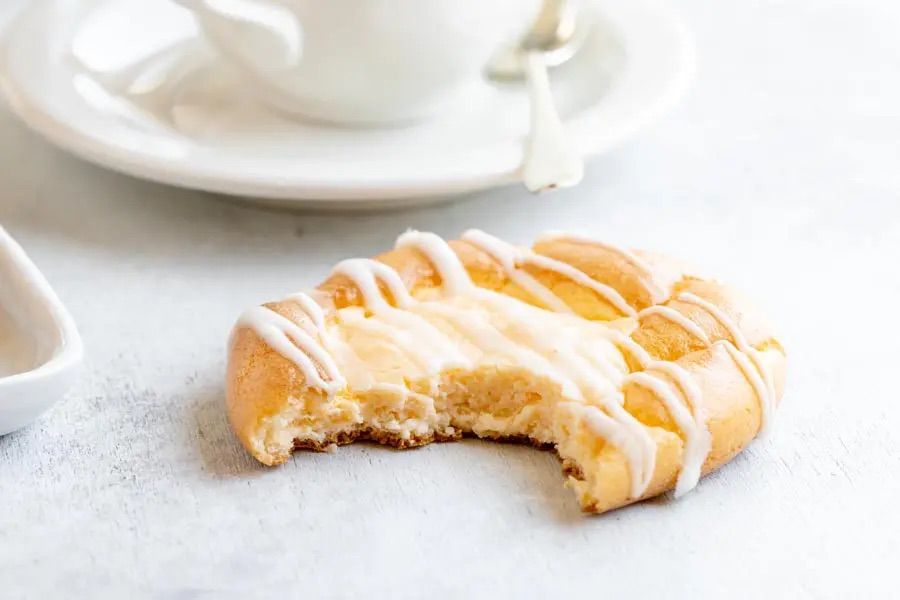
What's your favorite breakfast on a slow Saturday? Ours is pancakes, always! Leave yours in the comments below! 
0 Comments

Gluten-Free and Dairy-Free Traditional Cheese Danish

4/13/2023

0 Comments

 
gluten free / dairy free / soy free / kid friendly / nut free 

Picture

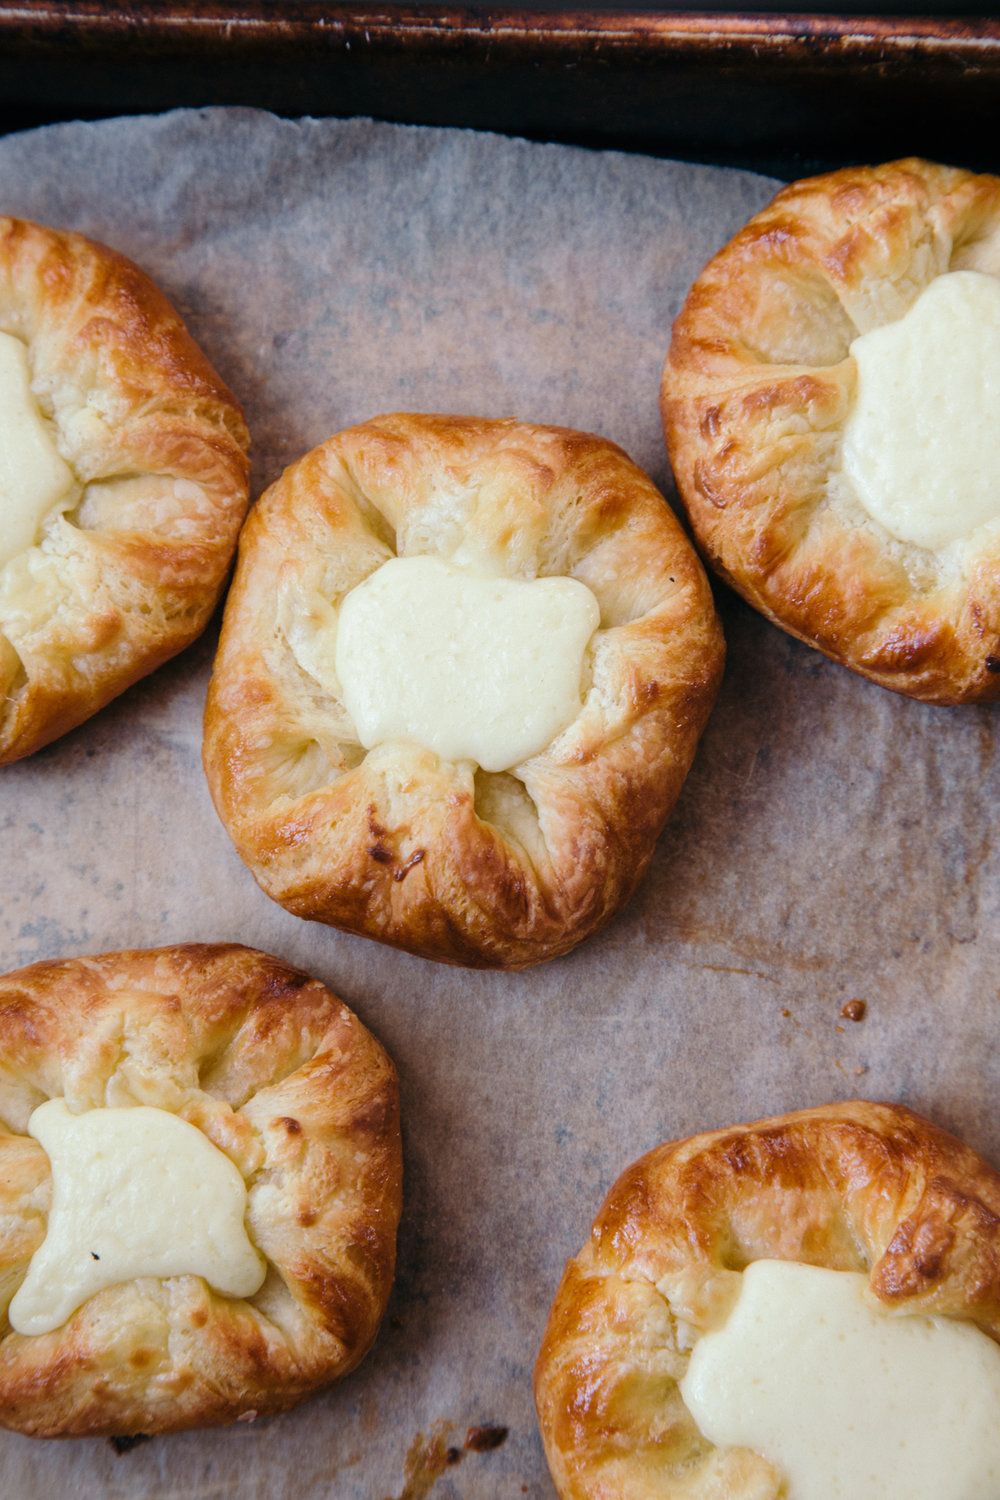
Are you in a breakfast or tea time rut? We were. I was also in this place where for the past couple of years I was craving the Cheese Danish of my child hood.

Except one without all the gluten, dairy, preservatives and other things I didn't know was baked inside that fluffy, scrumptious, cheesy pastry.

Recreating one that would be just as cravable felt like a herculean task, and while it wasn't a "quick and easy" meal, the labor of love and sourced ingredients that went into these made them worth it.  

I made a big batch, just in case they came out good, and so glad I did! They freeze amazingly well, my kids LOVE them and we've been going back for them time and time again. 

The recipe is below and I do want to give one tip: If you are able to have dairy (and are just here because you're gluten free) I would highly recommend using REAL cream cheese to those that can tolerate it. While the dairy-free brand I used worked just fine, I feel like having that TRUE cream cheese flavor would have made these a 12/10! 
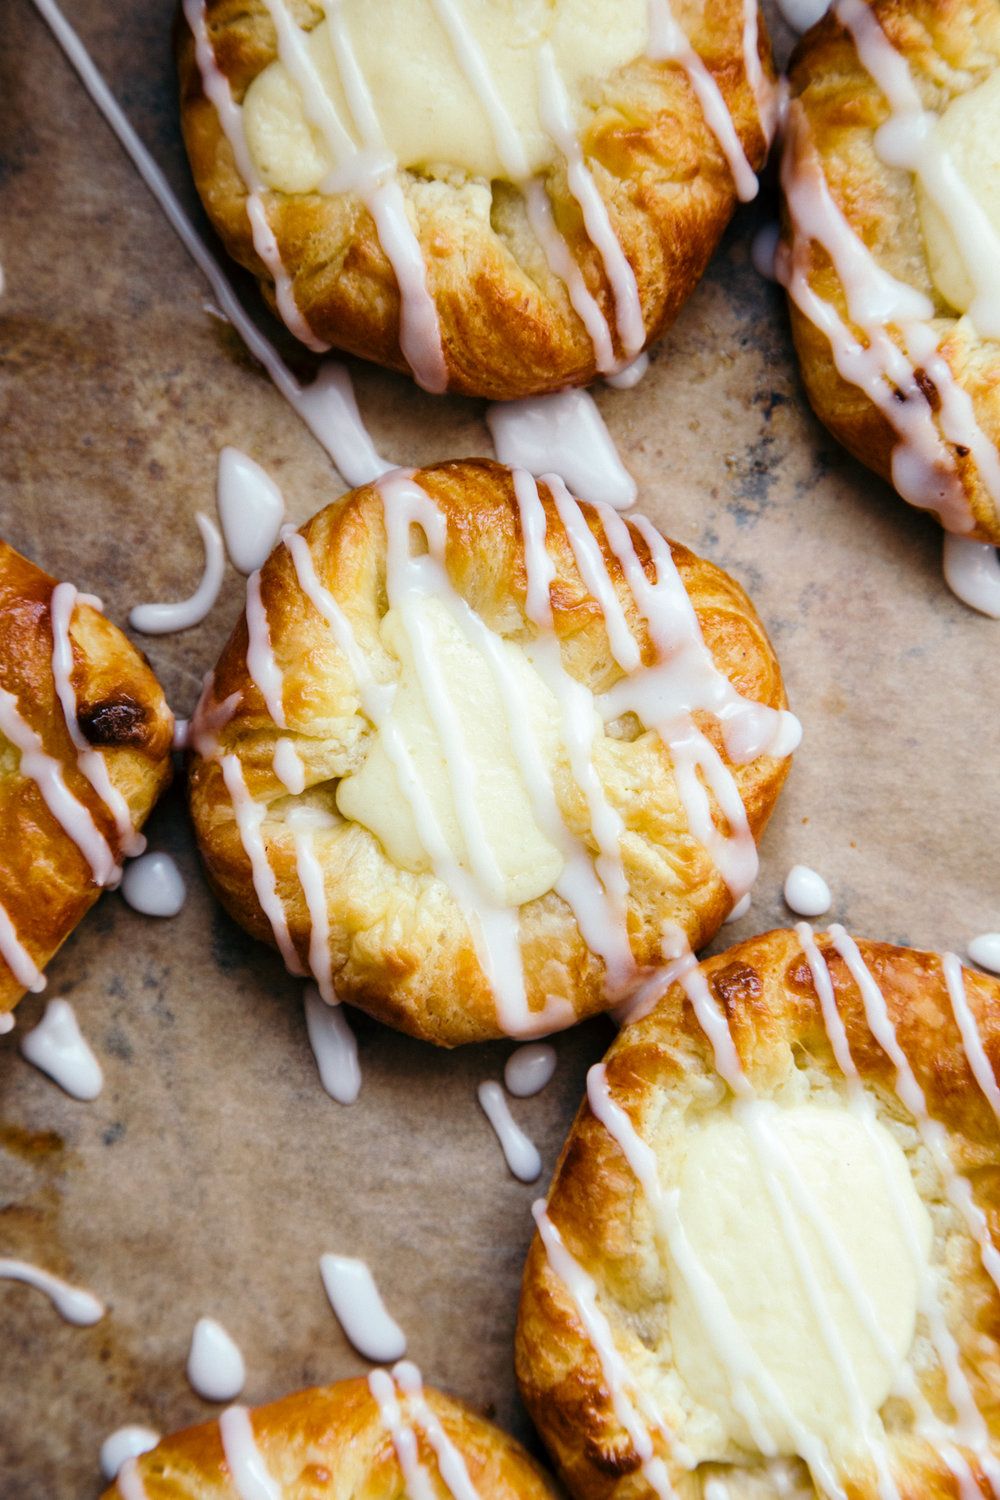
Picture
INGREDIENTS:

  • 1 bag pre-made crescent roll dough (I bought and prepared this one) 
  • 8 oz. cream cheese (if tolerated) or vegan cream cheese (I used this one) 
  • 1/2 C. organic white sugar (you can use a low-glycemic option, but I didn't want it to effect the coloring of my danish)
  • 1 tsp. vanilla 

For the icing: 
  • 1 C. organic powdered sugar
  • 2 TBSP. milk of your choice (I used almond) 


DIRECTIONS: 

  • Prepare dough per package instructions. (This step took a couple of hours because of the yeast needing to proof.)
  • Preheat oven to 350 degrees.
  • Roll out the dough and form 8 "baskets" and shape into  circles. Gently place onto a baking sheet.
  • Mix together cream cheese, sugar and vanilla until smooth. Spoon filling into the circles and spread to the edges.
  • Bake for 15 to 20 minutes, or until edges of Danishes have turned a nice golden color. Allow to cool.
  • To make the icing, whisk together the powdered sugar and the milk until it's well blended and there are no lumps. Fork drizzle over the cooled Danishes.
Picture
0 Comments

Gluten and Dairy Free Biscuits and Gravy

8/23/2021

0 Comments

 
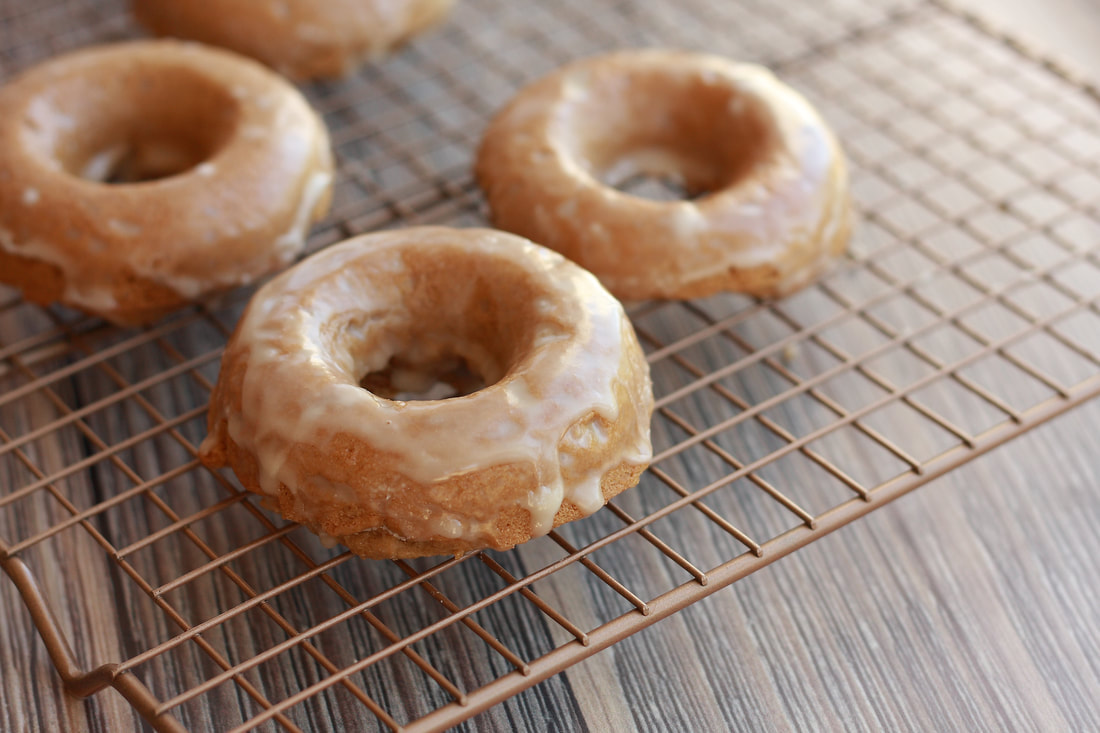
gluten free - dairy free - soy free - sugar free - nut free

Picture
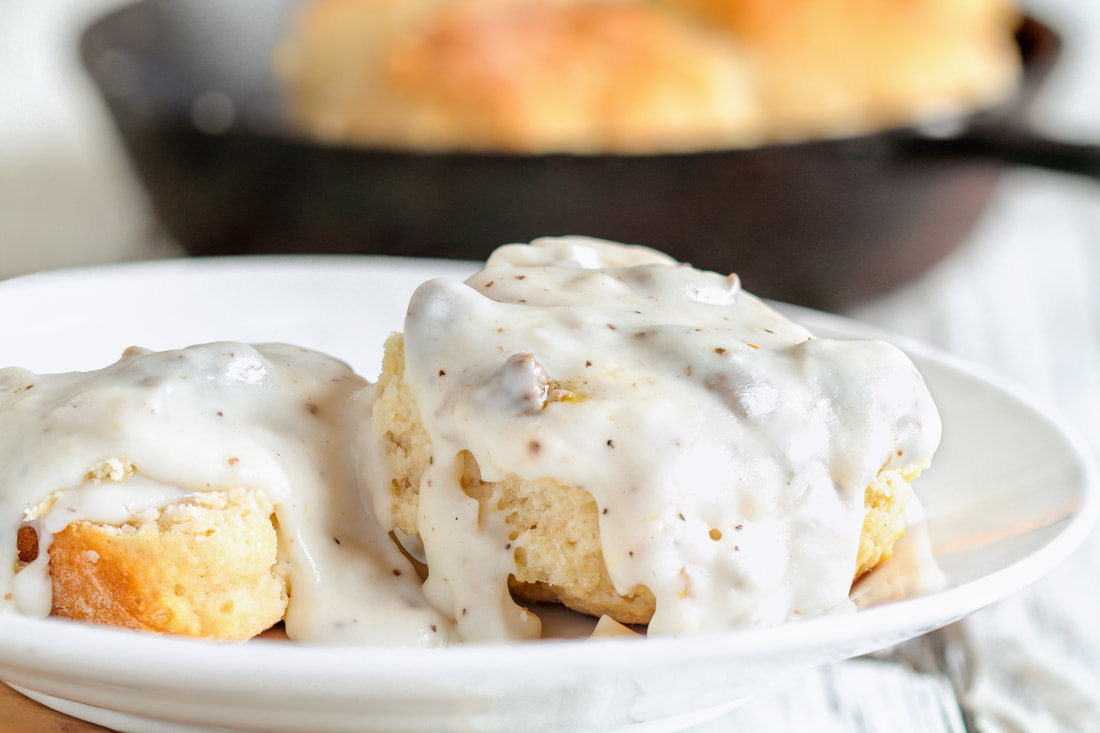
Bringing back a CLASSIC breakfast.

My Paleo Biscuits and Gravy was one of the first recipes that debuted on this blog almost TEN years ago (I'll spare you the link, my photography of it back then wasn't stellar, haha. If you look hard enough around here you can find it.) and I wanted to create a new and improved recipe now that I have  mastered flakier biscuits and a creamier gravy than I previously made. 

While not paleo, you could swap the gluten free 1 to 1 with a Cassava flour to keep it grain free. Or you could stick with my OG recipe suggestion of almond flour for a denser, heartier biscuit.  You do you, but I like the FLUFF. 
Picture

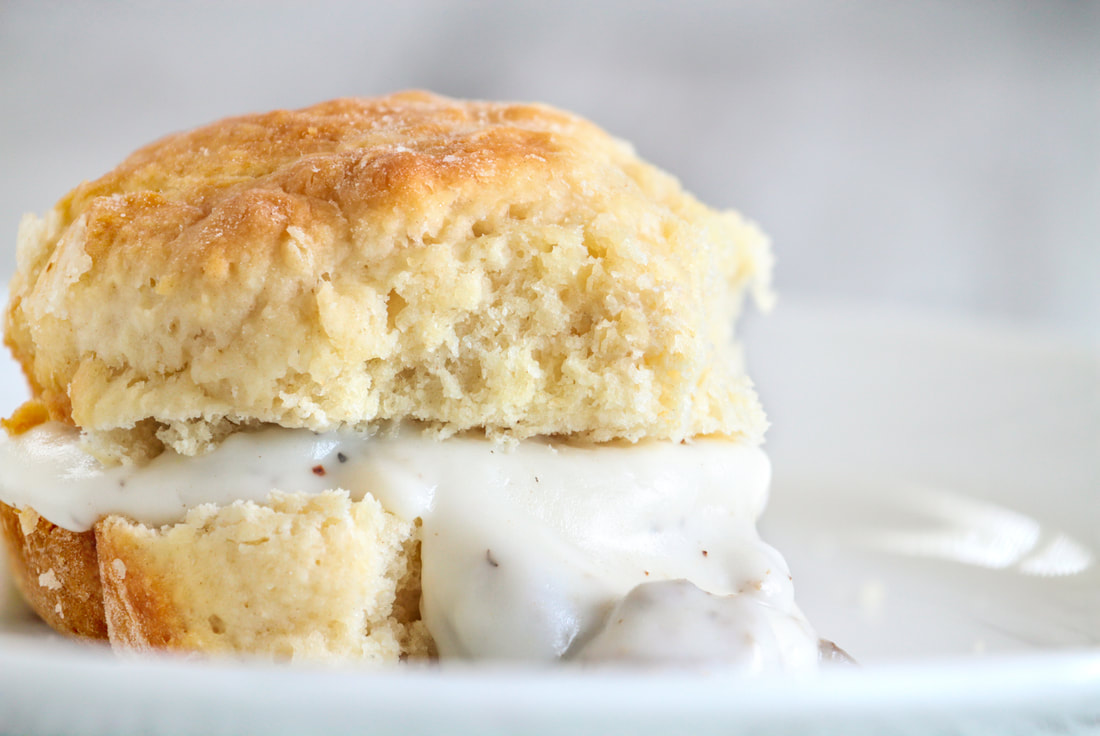
So much healthier than the restaurant variety, you can make extra gravy and freeze it to keep on hand for weekend brunches and breakfasts. I would suggest making your biscuits fresh, but you can freeze them as well. 

Biscuits and Gravy 

Biscuit Ingredients
  • 1/3 C dairy-free butter
  • 1/3 C vegan sour cream
  • 1/2 TBSP organic sugar
  • 1 1/2 C gluten-free one to one all purpose flour 
  • 1 1/2 tsp baking soda 
  • 1  tsp cream of tartar
  • 1/4 tsp sea salt
  • 1/3 cup club soda or sparkling water

Gravy Ingredients
  • 1/2 lb gluten free sausage (we love organic AppleGate maple sausage or Jenny-O Sweet Italian)
  • 2 TBSP gluten free all purpose flour
  • 1 3/4 C. milk alternative
  • 1/4 C dairy-free cream
  • Sea salt and pepper to taste
​


Directions For The Biscuits
  • Preheat oven to 425° degrees.
  • Melt 1/3 cup dairy-free butter, to soft but not liquid.
  • Whisk vegan sour cream and sugar into melted butter until smooth.
  • Add flour, baking soda, salt and cream of tartar and stir with a fork until mixture resembles coarse crumbs.
  • Add sparkling water and stir until mixture comes together and is sticky. 
  • Lightly flour a clean surface and turn dough onto counter, turning to fully coat. Be careful not to mix the flour into the dough.
  • Flatten with your hands into a circle about 3/4" thick.
  • Fold in half to form a half circle, then in half again to form a triangular shape, and pat to 3/4" thickness again.
  • Repeat the last step. This folding is what creates the flaky, layered effect.
  • Cut into circles with biscuit cutter or large cup and arrange in a round cake pan so the biscuits are so close they are almost touching.
  • Bake biscuits for 7-10 minutes. Remove biscuits just as edges begin to turn a golden brown and don't overbake!

Directions For The Gravy
  • Brown sausage in a skillet. If your sausage has a casing, make sure to remove before browning. 
  • Once browned, stir in gluten free flour and continue to cook over medium heat for 1 minute, stirring constantly.
  • Pour in milk while stirring and continue to stir until thick.
  • Season with salt and pepper to taste. 
  • Serve over fresh biscuits, cut in half. Enjoy! 

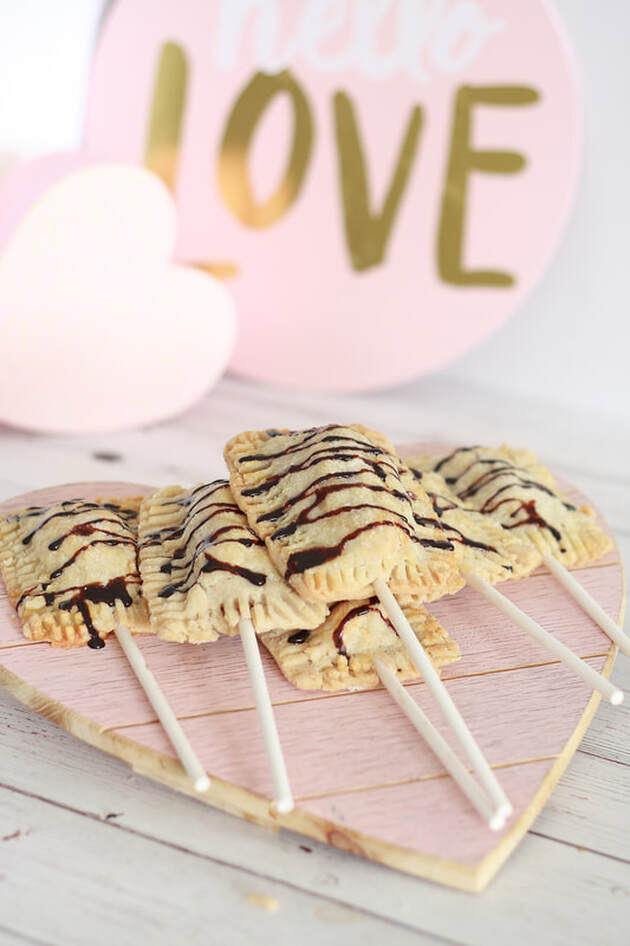
​Serve these up with a fresh fruit salad and piping hot coffee or tea for a delectable morning indulgence. This recipe remind me of a rainy day or breakfast at a small-town café. Do Biscuits and Gravy bring to mind any special memories for you?
0 Comments

Allergen-Friendly Strawberry Pop Tarts

9/5/2020

0 Comments

 
Gluten Free - Dairy Free - Soy Free - Corn Free - Nut Free

Since learning so much about the food we consume and things we put into our bodies I often look back at periods of my life. How I did things, what I consumed, what was thought about and what was simply routine. 

I think of my childhood and the grilled chicken and veggie dinners mixed with the trips for fast food and boxed breakfast pastries, and honestly, I shudder a bit. Wondering how it all played into altering genes and my autoimmune issues today. However, my parents were amazing parents to my sister and I and did the best they could with the knowledge they had. And so I have to move forward, do what I can to heal my body now, and do the best I can as a parent with the knowledge I have. 

I think back to living on my own in Los Angeles in my early twenties and making healthier, better changes for life in the entertainment industry and all of the physical work I was putting my body through. The gym, running and hip hop dancing. I cleaned up my eating in those years but it still wasn't anything near what it is now, because again, I didn't yet have the knowledge. 

And then the period after I was diagnosed with several food intolerances, genetic defects and an autoimmune disorder is where I took a too strict approach and lost too much weight and adopted a mindset that launched an unhealthy and unwarranted fear of food. 

Thus bringing us to today - a happy place. Where I am knowledgeable about WHAT goes into my body while having a passion to bring back comfort foods, happy foods if you will, into our life. Deprivation isn't a way to live, but neither is giving into desires for food that can cause us harm, so I can say, in the past few years, I have found my niche. My happy place as a chef, a food blogger and a mama in the kitchen. 

Comfort foods that bring connection, warmth and nutrition while being allergen-friendly and more wholesome than a packaged food item. 

Which is why today I present homemade strawberry pop tarts for you and your family to enjoy. Yum! 
Picture

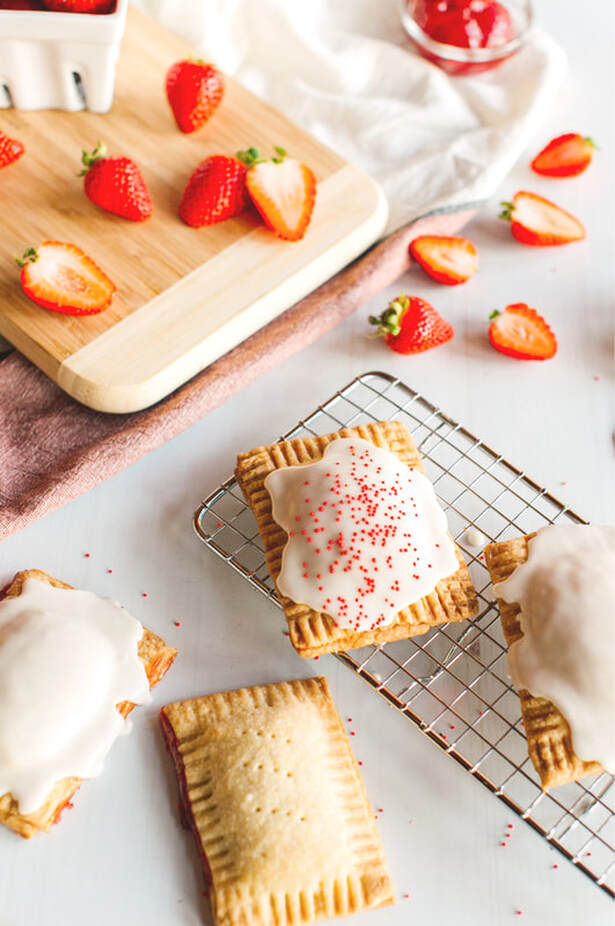
Gluten free, dairy free, soy free, corn free and nut free - these pleasant pastries pack delicious strawberry preserves, sweetened naturally and thickened with potato starch versus corn. 

I used gluten-free pie shells and a homemade corn-free powdered sugar glaze to bring back memories of school mornings as a child. Greyson LOVED these and gobbled one up before one of our pre-k home school mornings and I will be making them again as a treat this fall. I am excited to try different flavors as well - such as a warm coconut sugar pop tart in lieu of the famous brown sugar pop tarts - as well as a blueberry and a double chocolate. 

​

Strawberry Poptarts

Ingredients:

Note: I used a pre-made gluten-free pie crust from Wholly Wholesome because this pregnant mama wanted to make it easy. However, if you can't find one or want to whip one up - here is the recipe I use when making homemade. 

For a homemade crust:
  • 2 ½ cups all-purpose gluten free flour
  • 1 teaspoon coconut sugar
  • 1 teaspoon sea salt
  • 1 stick vegan butter
  • 6 TBSP. coconut oil 
  • 1 large organic egg
  • 2 TBSP. vegan milk 
  • 6 TBSP. ice water

For the strawberry filling: 
  • ¾ cup strawberry jam or fresh preserves
  • 1 TBSP. potato starch
  • 1 TBSP. ice water


Directions:

If you're making homemade dough:

  (if you bought store bought - skip down to assembly)
  • Combine the gluten-free flour, coconut sugar and salt in the bowl of a food processor or large mixing bowl. Add your vegan butter and coconut oil and mix with your  mixture or a handheld mixer until the mixture is crumbly. Add the cold water and mix lightly just until the dough starts to hold together. 
  • Gather dough and divide in half. Form each half into a disc. Wrap each tightly with plastic wrap and refrigerate 30-60 minutes. It can also be chilled overnight. 

Assembly and filling:

  • Remove dough from refrigerator and allow to rest for 10-15 minutes. 
  • Combine potato starch and 1 tablespoon cold water in a small sauce pan. Whisk until smooth. Add your preserves and heat over medium until it comes to a boil, stirring consistently. Once at a boil, remove from heat and allow to cool until ready to assemble. 
  • Lightly flour a clean work surface and dust the dough with flour. Roll the dough to cut into a 9" x 12" rectangle. Cut the rectangle into 9 equal pieces by cutting four lines across on the 12-inch side and three down the 9-inch side. Gather dough scraps together and set aside. (You can also invest in a set of rectangular cookie cutters which I used for these as well as my S'Mores Pie Pops - super easy!) 
  • Place the 9 individual pieces of dough on a parchment lined baking sheet.
  • Beat together your egg and vegan milk. Brush the egg mixture over the cut pastry pieces. Place 1 TBSP. of filling in the center of each pastry and cover with your other 9 cut rectangles. 
  • Prick the tops with a fork to get the classic pop tart look and allow the pop tarts to vent. Seal each tart with the tines of a fork to hold together. 
  • Brush the tops with your egg and milk mixture and bake for 30 minutes or until golden brown. 
  • Remove the pastries to a wire rack and cool until ready to frost. 
  • ​The frosting was super simple, I just mixed powdered sugar and vegan milk to the consistency I wanted and added it on top with a few sprinkles we had left over from Grey's birthday cake. 
  • Enjoy! Store for up to a week in a sealed container or freeze to enjoy later! 


​What was your favorite pop tart flavor as a kid? Have you made them homemade before? Tell me in the comments below! And if you have a favorite you want to see next - comment here or on my Instagram at @noshandnurture and we will do that one next! 

Picture


​Pin It!


More Like This 

S'Mores Pie Pops
Glazed Maple Donuts
Christmas Gingerbread
0 Comments

    categories

    All
    Corn Free
    Dairy Free
    Egg Free
    Gluten Free
    Grain Free
    Kid Friendly
    Nut Free
    Paleo
    Soy Free
    Sugar Free
    Vegan
    Whole 30
    Yeast Free

    archives

    July 2023
    April 2023
    August 2021
    October 2020
    September 2020
    August 2020
    February 2020
    November 2019
    June 2019
    March 2019
    November 2018
    June 2018
    March 2018
    October 2017
    April 2017
    February 2017
    January 2017
    August 2016
    July 2016
    April 2016
    March 2016
    December 2015
    October 2015
    November 2013
    August 2013
    July 2013
    June 2013

    RSS Feed

contact

Contact Mandi @ Nosh and Nurture
Advertise @ Nosh & Nurture or The Clean Plate with Mandi 

Picture

about

Nosh & Nurture was born of this journey I am on to better the health of myself, my family and those around me.  What started as a simple compilation of recipes has grown to a all-around lifestyle journal with ways to incorporate organic products into your home, pantry and beauty cabinet.  I also include stories on pregnancy, new motherhood, travel, Proverbs 31 marriage, and spiritual health, as I am a Christian who couldn't do any of this without my Lord & Savior Jesus Christ. For more of my story you can click here. 

All recipes are gluten-free and dairy-free with a lot of soy-free, grain-free, sugar-free options. 

    additional links

Privacy Policy
Disclaimer
FAQ


Find Me Gluten Free - An Amazing App to Help You Find the Best + Safest Gluten Free Eats Anywhere!
Picture
All content herein is owned by Mandi Pimental,Nosh & Nurture and The Clean Plate with Mandi. Pinning images is allowed, however, reposting blogs, recipes, photos or additional content without a link back to NoshandNurture.com is prohibited. 

© 2012-2023 Nosh & Nurture. All Rights Reserved.
Website by Weebly. Photography, Graphics and Content by Mandi Pimental, unless otherwise credited. 
  • HOME
  • NOSH
  • NURTURE
    • Homesteading
    • Homeschooling
  • TRAVEL
    • Get A Quote (Land Travel)
    • Get A Quote (Cruise)
    • Disney Vacations
    • Travel Blog >
      • Destinations
      • Eateries and Cafes
      • Travel Tips
  • The Clean Plate
  • ABOUT
  • CONTACT
  • Platinum Key