|
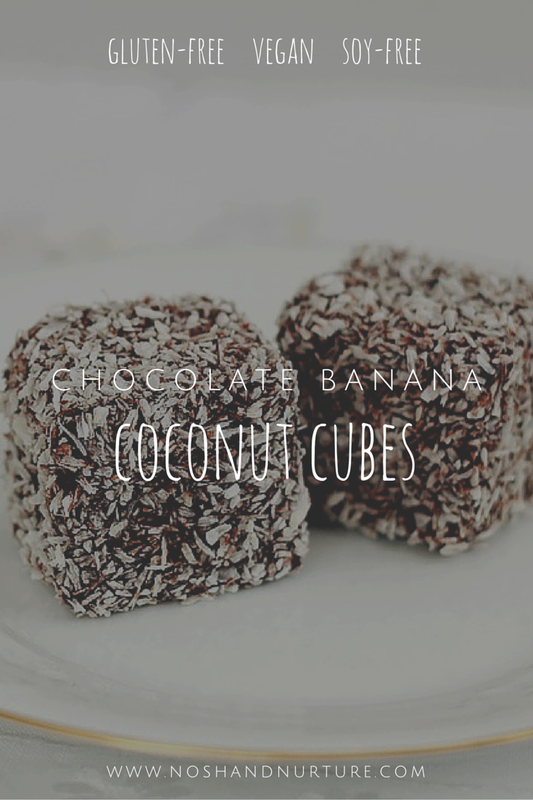
dairy free - gluten free - soy free - nut free (aside from the coconut) - refined sugar free Enjoy a cube of this decadent cake with coffee in the morning, tea at night or as a mid-day snack. The sweetness comes from bananas and dates, while the richness comes from light coconut milk. This treat is especially helpful to those of us in our last trimester of pregnancy, as the dates can help prepare our cervix for a smoother natural birth.  Ingredients: 1/2 cup unsweetened cocoa powder 1 cup gluten-free oat flour 1 cup gluten-free all-purpose flour 1/4 teaspoon sea salt 1 teaspoon cream of tartar 1 1/2 teaspoon baking soda 4 very ripe bananas 4 ounces dates (about 8 large), pitted and roughly chopped 1/2 cup light coconut milk 2 teaspoons pure vanilla extract 1/4 cup shredded unsweetened coconut Directions:
0 Comments
Submitted by a Guest Contributor gluten free - vegan - soy free - refined sugar free - kid friendly - grain free - paleo These brownies work well with most diets if cocoa is tolerated. They are easy to make ahead of time and take on the go.  Ingredients:
Directions:
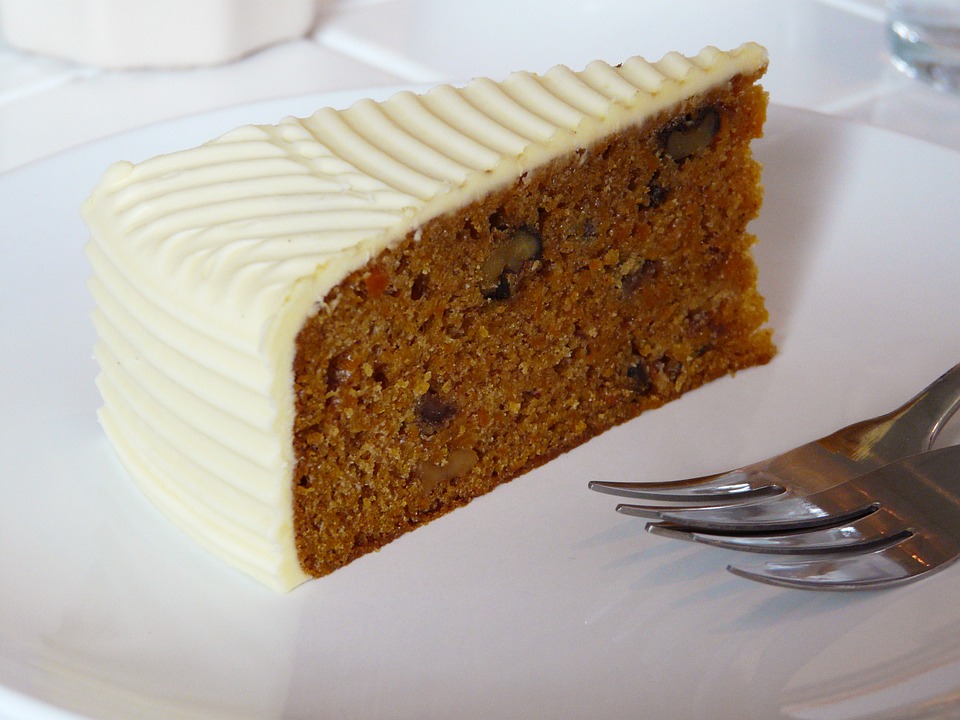
Guest Contributed Post gluten free - vegan - egg free - kid friendly This recipe relies on unsweetened applesauce and almond milk to provide the classic moist texture of traditional carrot cake in a vegan form. 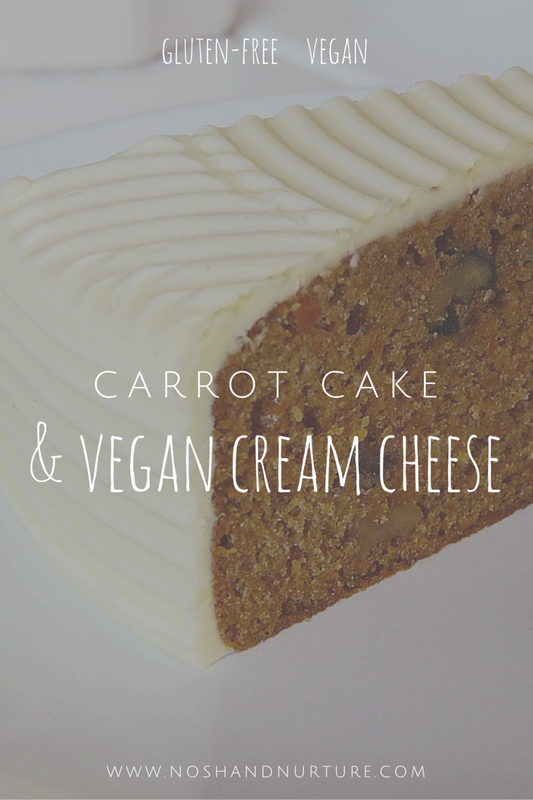 Ingredients: Carrot Cake 2 1/2 cup gluten-free all purpose flour (I use Bob's Red Mill 1-to-1 1 teaspoon salt 2 teaspoons baking soda 4 teaspoons baking powder 1 tablespoon ground cinnamon 1 teaspoon ground nutmeg 1 teaspoon ground ginger 3 tablespoons egg replacer 2 cups light brown or coconut sugar 1 cup avocado or grapeseed oil 1 cup almond milk 1 cup unsweetened applesauce 3/4 pound carrots, finely grated (about 3 cups) 1 cup walnuts or pecans, chopped 1 cup seedless raisins Frosting 12 tablespoons vegan butter 1 1/2 pound Daiya or soy cream cheese, cold 1 1/2 cup corn-free powdered sugar 1 teaspoon vanilla extract Directions:
 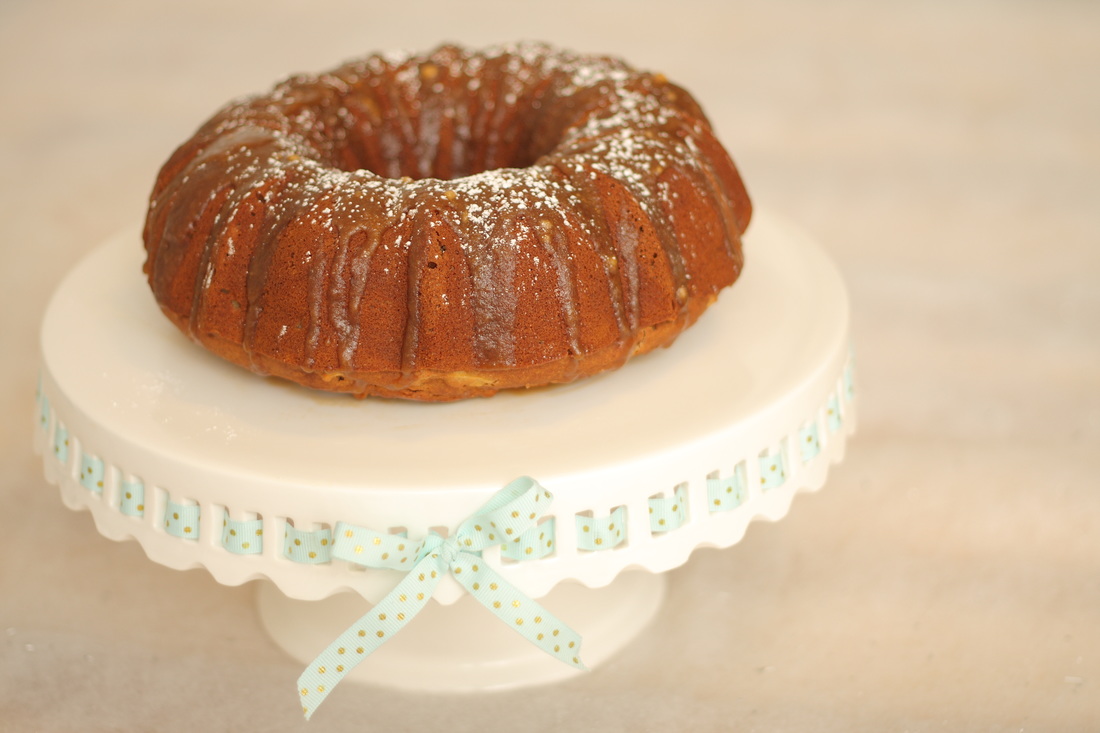 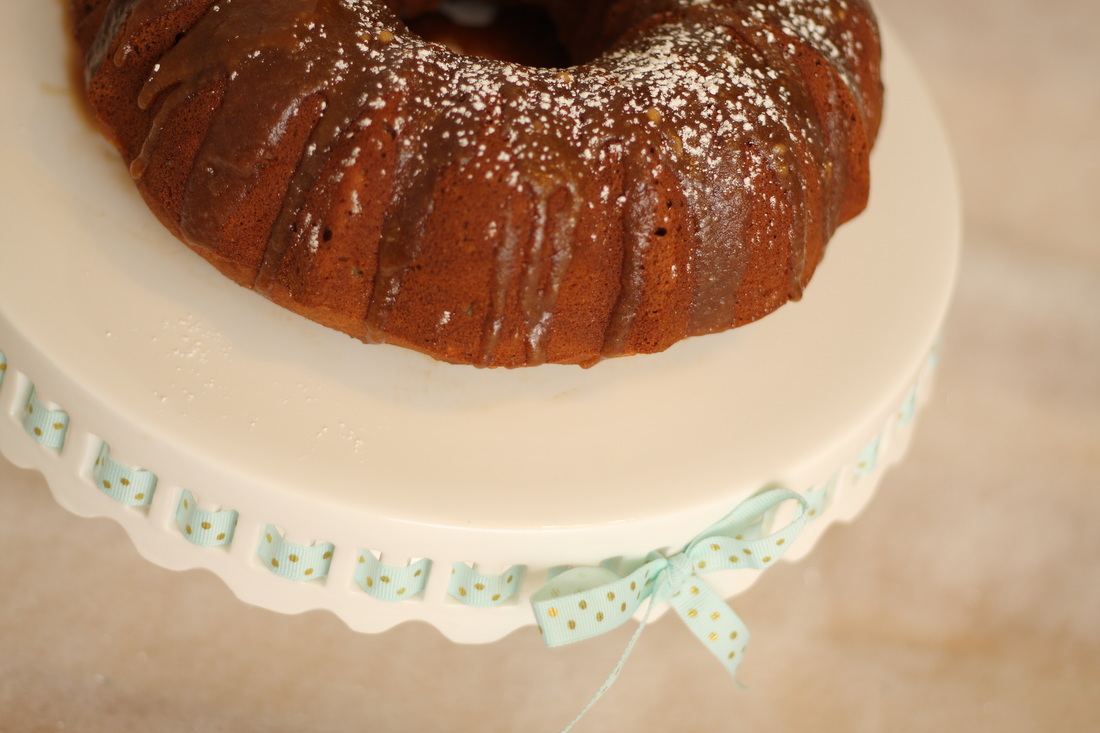 This little beauty was my official entry to the Earth Balance Holiday Bake-Off 2015. I had never attempted a bundt cake before the bake-off, but felt ambitious. This spiced, flavorful cake came out moist, fluffy and perfect. It's perfect as dessert or a decadent breakfast with a mug of Crio Bru of coffee. It's one of my most involved recipes, but well worth every moment. It's also gluten-free, vegan, nut-free, soy-free and refined sugar free (except for the glaze, while optional, gives it an amazing rich, warm flavor) Serves 16. 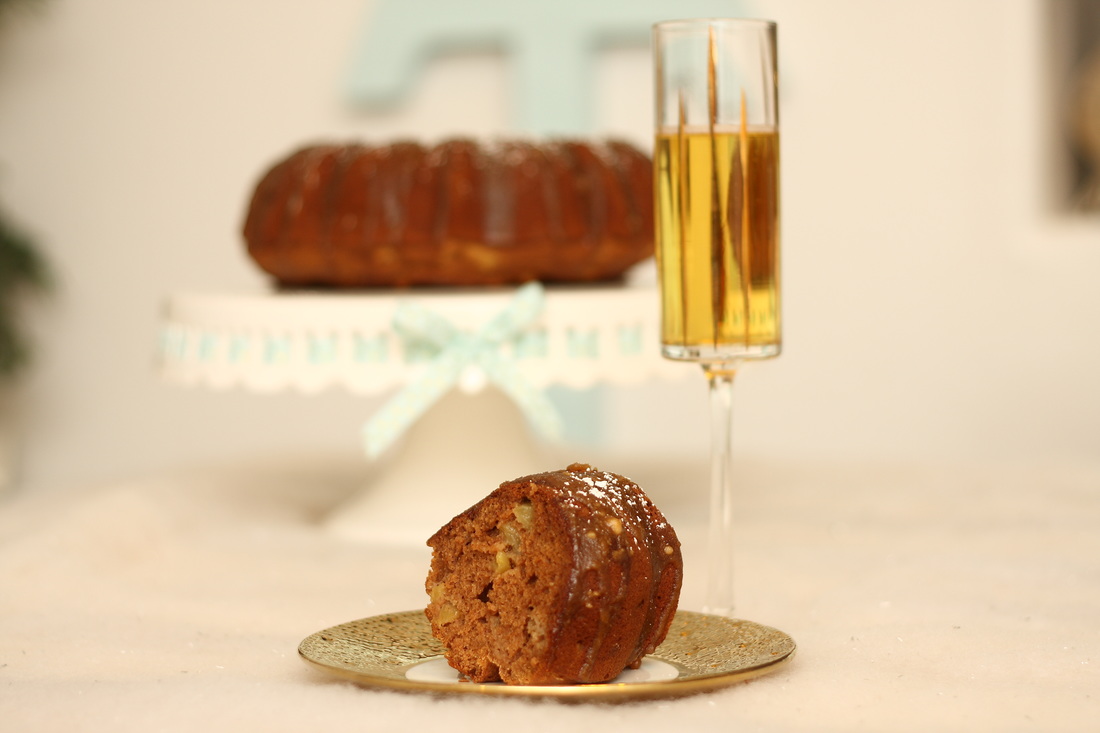 Ingredients: Cake: 2 C. brown rice flour 2/3 C. potato starch 1/3 Cup tapioca starch 1 TBSP. baking powder 1 1/4 baking soda 3 tsp. cinnamon 1/3 C. coconut milk 1 tsp. lemon juice 3 TBSP. ground flax seed* (can be omitted, and use 3 eggs, if egg is eaten/tolerated) 9 TBSP. water* (omit if eggs are used) 3/4 tsp. xanthan gum 1/2 C. coconut sugar 1/2 tsp. ginger 1/2 tsp. sea salt 1/2 c. maple syrup or bee-free apple honey 3 TBSP. apple juice 3/4 C. applesauce 2 C. apples, cored, peeled and diced. 2 tsp. organic vanilla extract Glaze: 1/3 C. Coconut Sugar 2/3 C. corn-free Confectioner's Sugar (I use Dandie's) 3 TBSP. Coconut Cream 3 TBSP. Earth Balance Soy-Free Butter 1 tsp. organic vanilla extract Directions: Preheat oven to 325 degree and grease bundt pan with vegan butter or oil generously. Whisk flours, xanthan gum, cinnamon, ginger, baking powder, baking soda and sea salt in a small bowl and set to side. If using flax eggs, prepare flax eggs by combining 1 TBSP. of ground flax seed with 3 TBSP. of water. Set aside for 15 minutes to gel. In a large bowl, mix Flax Eggs or regular eggs with coconut sugar and maple syrup until blended. Slowly add and mix on your lowest speed setting, applesauce, vanilla, apple juice, coconut milk, lemon juice and dry mixture. Do not over mix. Add in apples 1 cup at a time. Mix on low until coated. Slowly pour or spoon batter into prepared bundt pan. Place in oven for 50-55 minutes, not opening the oven for the first 45 minutes. Check for doneness with a toothpick. Remove from oven and allow to set for 10 minutes. Prepare the glaze by mixing all glaze ingredients in a small bowl until no lumps remain. Pour into small sauce pan and cook over medium-low until warmed. Remove cake and place on cooling rack over a sheet of parchment paper. Pipe on or spoon on glaze. Top with a dusting of confectioners sugar for presentation. Transport to cake plate once cooled. Enjoy within three days. May freeze up to two weeks. 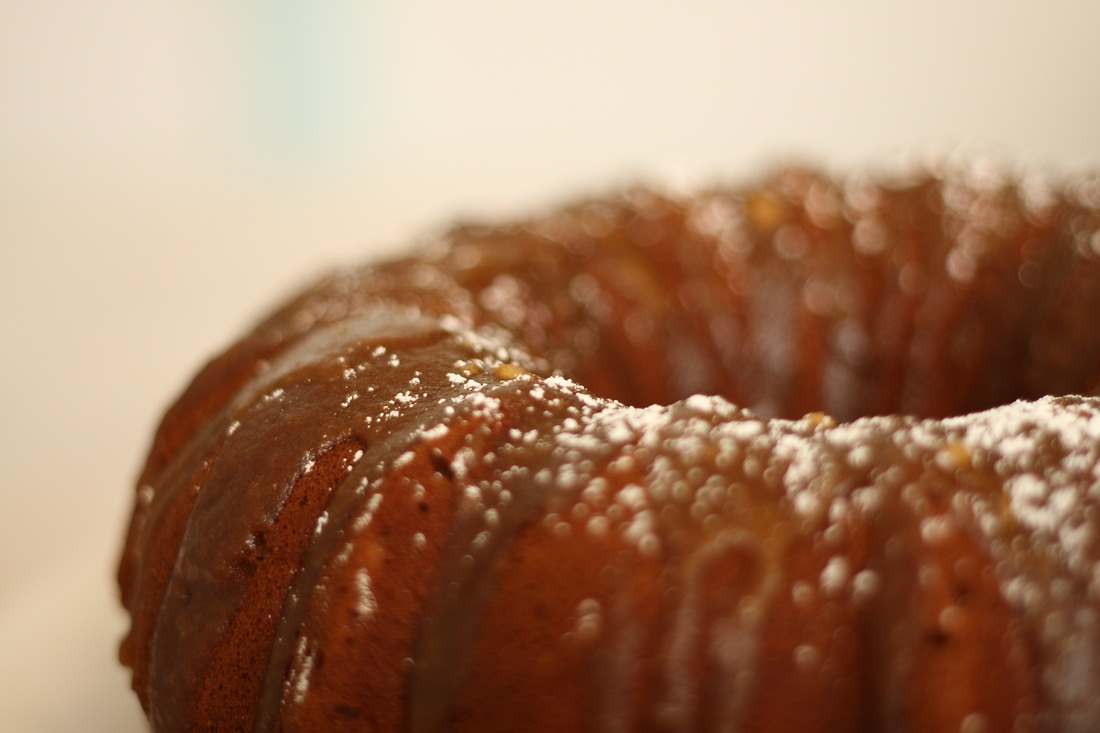
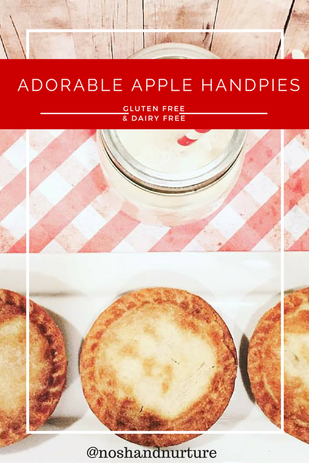 So, MONTHS ago, Mr. Charming and I invested in a hand pie maker. And it sat. And sat and sat and sat in the cupboard until one night recently when I was craving pie and remembered it was there. Sad and lonely and gathering dust. I'd been on a kick with Strawberry Pie since our coastline trip, but since I am watching my strawberry intake due to trying out a low-histamine diet, I thought the tried-and-true traditional apple pie sounded delicious. And I wanted to see if I could get them to come out cute & plumpy. That & the idea of getting A WHOLE PIE (in theory) to myself sounded really fun. If you know me, I'm not a big sweets person anymore since adopting a primarily Paleo lifestyle. But sometimes, a girl just has to have pie. And I have now find my favorite new way to eat it. I fell in love with how perfectly symmetrical, flaky and golden brown these came out. The mini pie maker I use is by Sunbeam and can be found online and in stores. I picked mine up on sale at a Fry's Grocery Store as an impulse buy. Below you will find my recipe for the gluten-free, dairy-free, nut-free, soy-free, egg-free, low sugar (depending on the pie crust you choose, the one I buy had under 2g.) pie we made and it is DELICIOUS. I always surprise myself sometimes with how decadent and sweet my confections come out sometimes without using sugar in the mix. The crust was buttery, flaky and the apples, with no added sugar, were the perfect mixture of tart and sweet. My plan is to now make a million other pie variations just so I can enjoy these little cuties again. Next up: A dairy-free turkey pot pie, then maybe a shepherd's pie variation, then something for fall, then maybe a sugar-free chocolate pie for Christmas. Seriously. It's an addiction now. These things are just too cute. 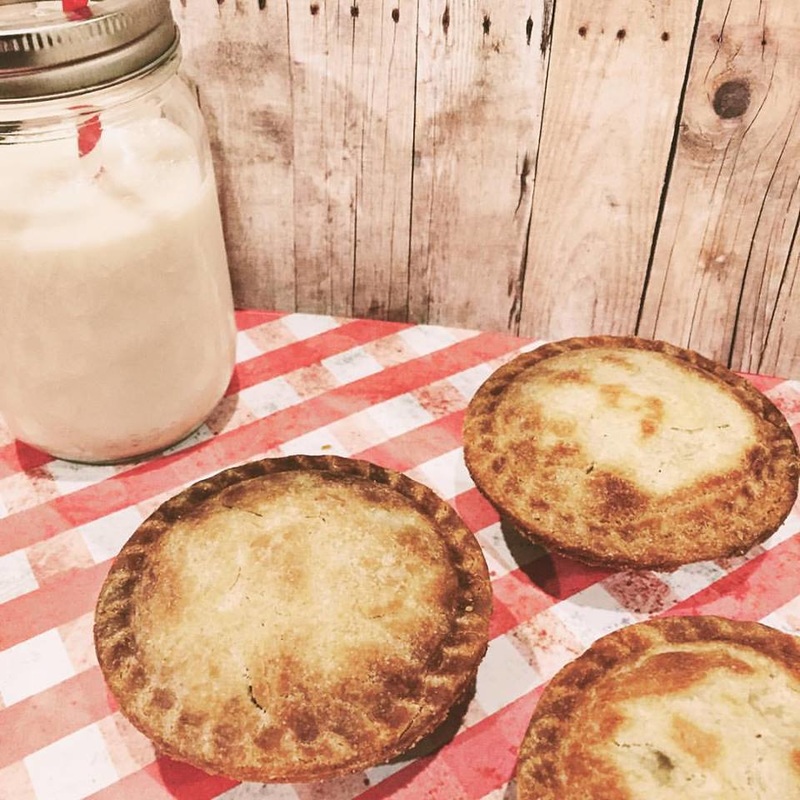 Ingredients: 6 Medium or 12-13 Mini Organic Gala Apples 2 Gluten-Free/Dairy-Free Pie Crusts Of Choice (I use Wholly Wholesome) 1 Tbsp. of Dairy-Free Butter or Coconut Oil Cinnamon to taste Directions: Thaw pie crust per package requirements but make sure dough is chilled before rolling/cutting. Wash and skin apples. Cut and cube apples into small cubes. You do not want large chunks in the mini pies. Cook apples, mixed with cinnamon, in a Tbsp. of dairy-free butter or coconut covered over medium heat until soft. I like my apples super cinnamon-y and cinnamon carries a lot of anti-inflammatory properties. If you tolerate cinnamon, use as desired. I probably used 1-2 tsp. to my 12 mini apples. Once apples are soft, turn off heat and set pan aside. Prep dough on a floured surface (I used a little coconut flour on my cutting board) and roll out to about 1/8 in. thick. My pie maker came with round cutters to fit my pie pan, and most will, so cut pie bottoms and pie tops according to your pie maker. As I stated before, if your dough is still slightly chilled it will cut, transfer and take to the hot pan much easier, put in the bottom pie dough and spoon in cooked apples until nearly full. Top with smaller cut pie top. Repeat for up to 4 pies and close the lid. Ours took 10 minutes for perfect, golden brown little pies. Remove from pan with a wooden spoon or spatula and let cool for ten minutes on a wire cooling rack. Serve & enjoy with a cold glass of almond or coconut milk or a scoop or dairy-free vanilla ice cream for a la mode. Have you made hand-pies before? What's your favorite variation?
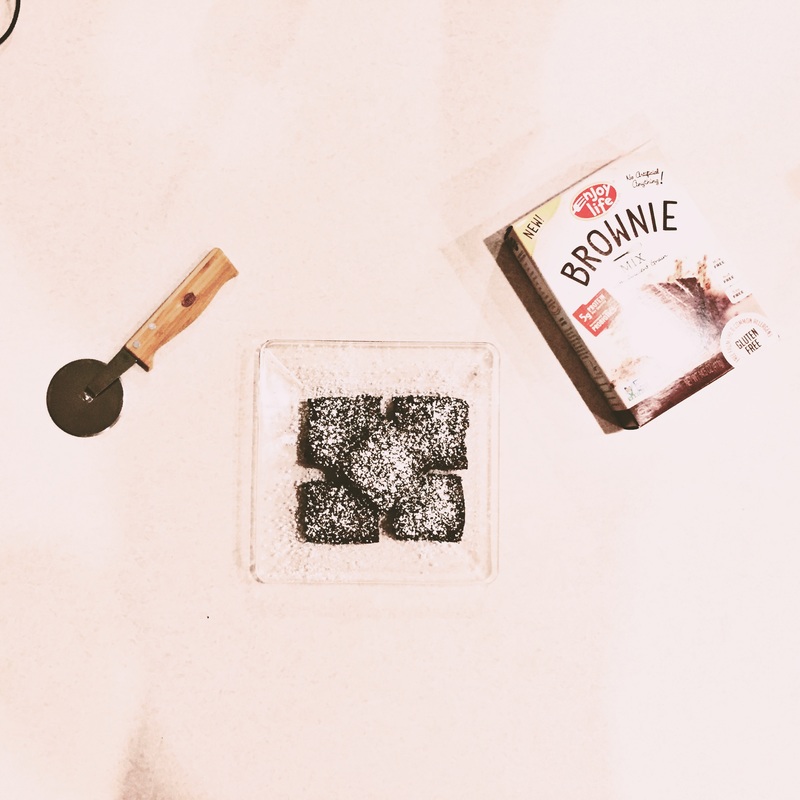
This week has been a good week. We are halfway to the weekend. So, that's awesomesauce. I personally loathe the phrase "Hump Day", I prefer the nice simplistic "middle of the week" when referring to this glorious Wednesday. Although my hormones have pushed my anxiety to un-fun levels and I was back at the doctors, there is always good to be found. Like how Mr. Charming and I have a meeting to be Pre-Marital coaches through church! How two of my girlfriends had babies this week! Or how Wanderlust is taking off, sending me to amazing destinations where I get to WRITE and SEE COOL THINGS. And then there is chocolate. Enter brownies. Gluten-free, dairy-free, probiotic packed brownies. I'm thankful for the relationship that this journey has given me with food. I feel like I'm not all the way there yet, as I'm still apprehensive to eat things that are probably ok for me to consume, I like that I don't view foods as "good" or "evil" anymore. (Except for man-made Frankenfoods, we can just go ahead and say those are evil.) But real, natural foods like fruits, vegetables, natural starches, natural cacao... those are God made foods that while some of us cannot tolerate them or need to watch our portions, they aren't good or bad. They just are. But I'm getting off topic. Back to brownies. As I've given up sugar 90%, except for natural sugar in my fruit & sparse honey intake, I do still believe in the occasional treat. I had these delectable little babies on my birthday and on Thanksgiving morning I will bake my grain-free donuts and top them with Enjoy Life chocolate chips. There is no because. It's simply the relationship I'm learning to have with food. The relationship that works best for me. 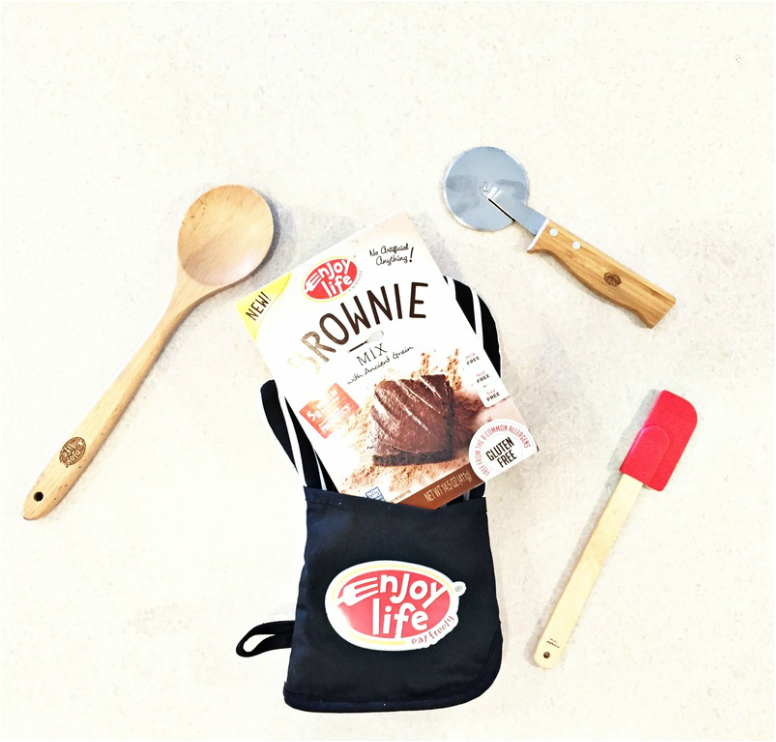 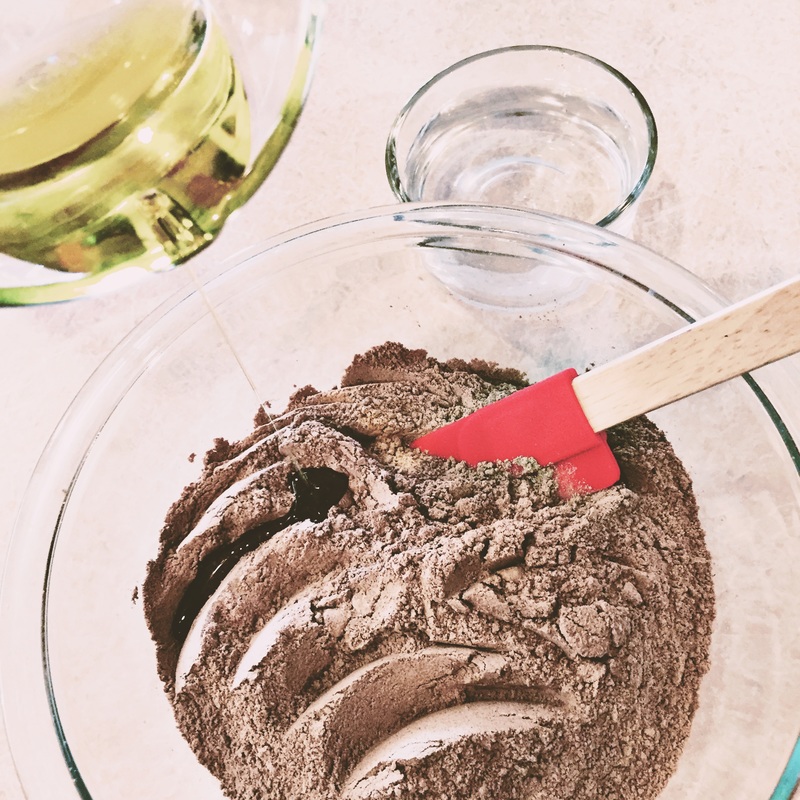 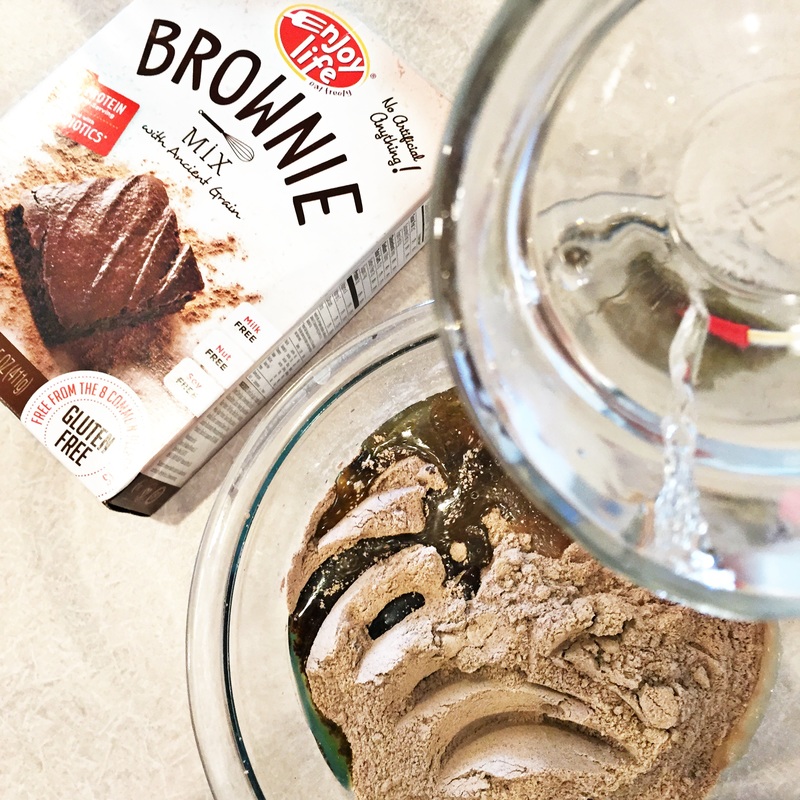 Mr. Charming and I made a delicious dinner of grilled basil and oregano pork chops and sweet potato last night and we were going to turn in early for a movie marathon night and so I thought brownies would be perfect addition. They were super easy to make. Seriously 4 steps. 1. Open Enjoy Life Foods Brownie Mix & pour in bowl. 2. Add water and a oil of your choosing (I usually ALWAYS use coconut oil when baking, but I was out and thought I'd "wing it" with some olive oil, which is an unconventional option in baking sweets, but it actually came out GREAT.) 3. Bake. 4. NOM NOM. For being a gluten-free ancient grain mix they were surprisingly moist - and the flavor on the brownie scale was an 8.5 out of 10. They are that deep, rich chocolaty chocolate. Mr. Charming even took a batch in to his work meeting today as a treat for his staff. He's totally got them used to gluten-free treats over there. I make my banana oat muffins for them occasionally. Such a good house wife I am, haha. 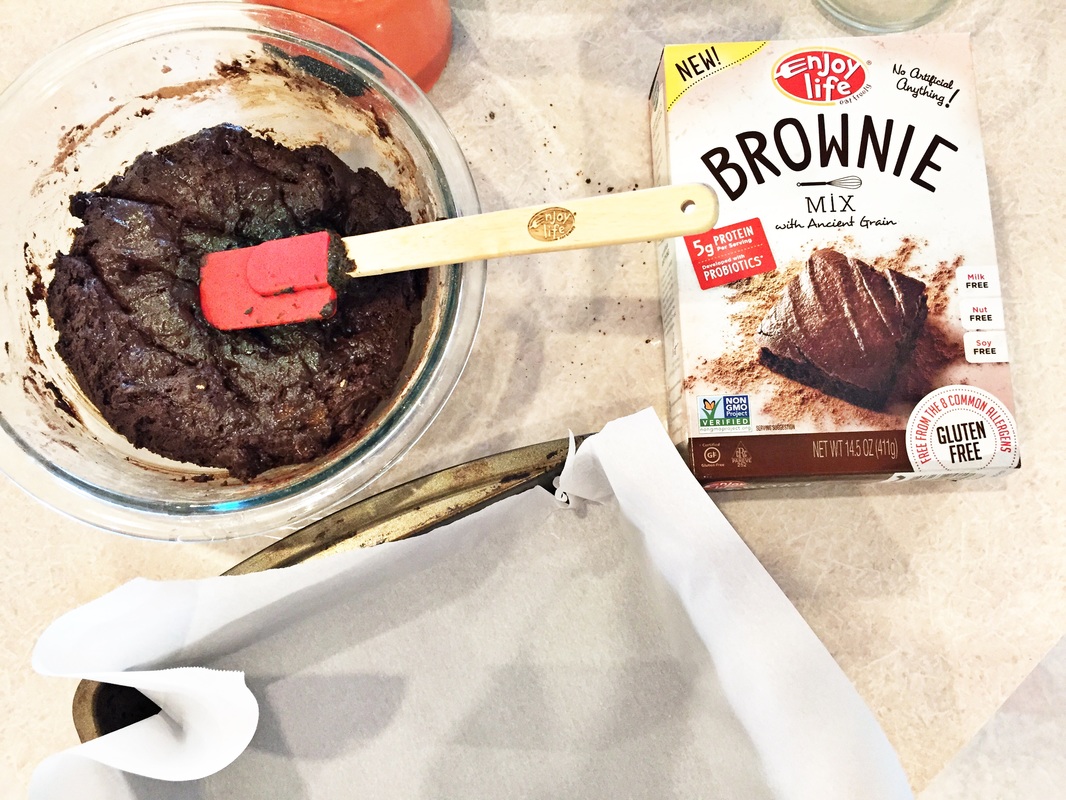 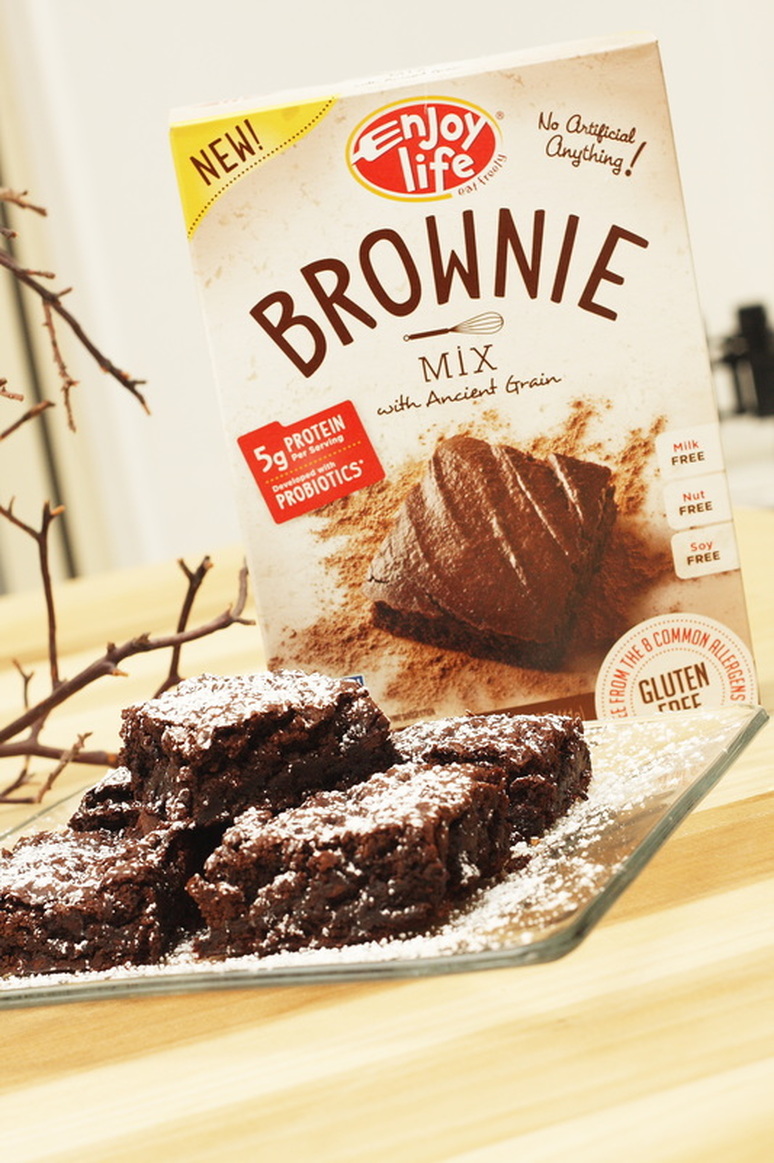 This is a sponsored post. I received free product from Enjoy Life Foods in exchange for writing this review. Although this post is sponsored, all opinions on its deliciousness, as well as the photography, are my own. I'd love to hear your thoughts on the new Enjoy Life brownies if you've tried them. Or your favorite gluten-free brownie recipe. Kick back, brew a pot of coffee, pop some treats in the oven and let's talk dessert! ;)
Ingredients:
1/4 cup raw cocao powder 2 ripe avocados 3/4 cup agave nectar, Grade B maple syrup or honey 3 tablespoons coconut oil 1 tablespoon vanilla dash sea salt Directions: Combine all ingredients in your Ninja blender until creamy, fluffy and smooth. Spread on the brownies. You can also chill and serve with chopped berries & bananas for a raw treat. Ingredients:
1 cup pre-soaked almonds 1 cup pre-soaked cashews 3/4 cup raw cacao powder 1 cup chopped dates 1/8 teaspoon sea salt 1/4 cup maple syrup Directions: Combine nuts, dates, cacao and salt in a food processor until the mixture is well combined. Slowly add up to 1/4 cup maple through the top of the processor while it is running. Stop adding maple when the consistency resembles brownie dough. Press the mixture into an 8×8 glass pan. Frost and refrigerate until you are ready to serve them.
INGREDIENTS
1 sweet potato 3 eggs (or egg replacer or flax-egg for egg-free) 1/4 cup coconut oil, melted 1/3 cup honey 1/4 tsp vanilla 1/2 cup dark chocolate chips 3 tbsp coconut flour 2 tbsp cocoa powder 1/4 tsp baking soda 1/4 tsp cinnamon 1/4 tsp salt INSTRUCTIONS Preheat oven to 425F Puncture the sweet potato with a fork several times and bake for 30 minutes Remove the sweet potato from the oven and reduce heat to 350F Peel the sweet potato and mash in a bowl Add the egg, coconut oil, honey and vanilla and mix well Add in all remaining ingredients and stir until thoroughly combined Pour into a greased baking dish Cook for 35 minutes Ingredients:
1 1/2 cups almonds 1/2 cup pure Grade B maple syrup 1 tablespoon Earth Balance dairy-free butter 1 tablespoon ground cinnamon 1 tablespoon chili powder (optional to add spice) Sea salt Directions: Preheat oven to 350 Degrees. Coat a baking sheet with coconut oil cooking spray and bake nuts in a single layer for 10 minutes; remove to cool slightly. Heat maple syrup in a saucepan over medium heat, stirring constantly; bring to a low boil, and stir in butter. Add nuts, and stir until coated; let cool. Combine cinnamon and chili powder (leave out if you don't want it spicy) in a bowl. Remove nuts from the maple mixture with a slotted spoon, and toss in the spice mixture. Lay nuts on a baking sheet, and sprinkle with a little sea salt; let dry. Store in an airtight container for up to 10 days. |
archives
October 2023
categories
All
|


 RSS Feed
contact
|
aboutNosh & Nurture was born of this journey I am on to better the health of myself, my family and those around me. What started as a simple compilation of recipes has grown to a all-around lifestyle journal with ways to incorporate organic products into your home, pantry and beauty cabinet. I also include stories on pregnancy, new motherhood, travel, Proverbs 31 marriage, and spiritual health, as I am a Christian who couldn't do any of this without my Lord & Savior Jesus Christ. For more of my story you can click here.
All recipes are gluten-free and dairy-free with a lot of soy-free, grain-free, sugar-free options. |
additional links
|

© 2012-2023 Nosh & Nurture. All Rights Reserved.
Website by Weebly. Photography, Graphics and Content by Mandi Pimental, unless otherwise credited.